16 Creative Wall Ideas That Completely Transform Blank Spaces
Blank walls are missed opportunities. Whether you rent an apartment, own a home, or just moved into a new space, those empty stretches of white can feel cold and unfinished. The good news? You don’t need a designer budget or a contractor to fix them. Simple, affordable changes can turn a bare wall into the most interesting part of a room. From paint tricks to thrifted frames, these 16 ideas cover every style, skill level, and budget — so you can stop staring at nothing and start loving your walls.
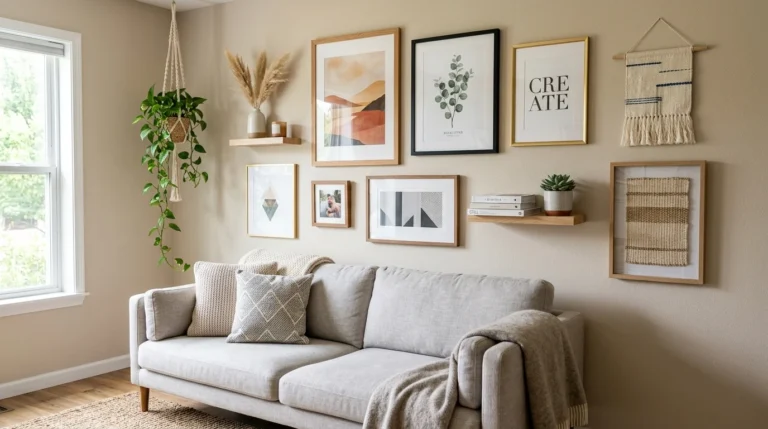
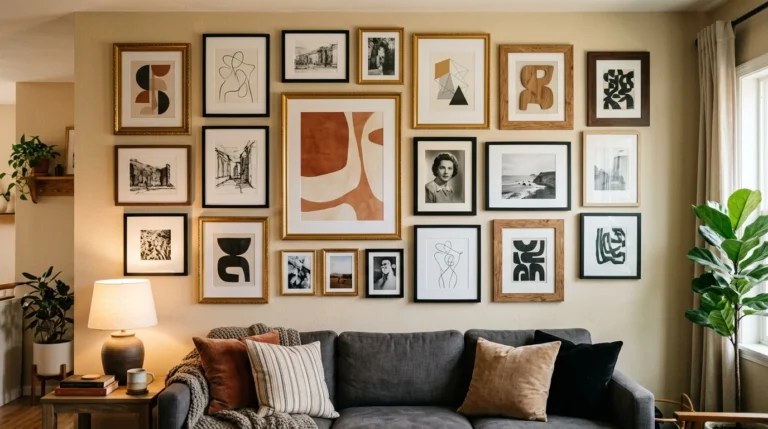
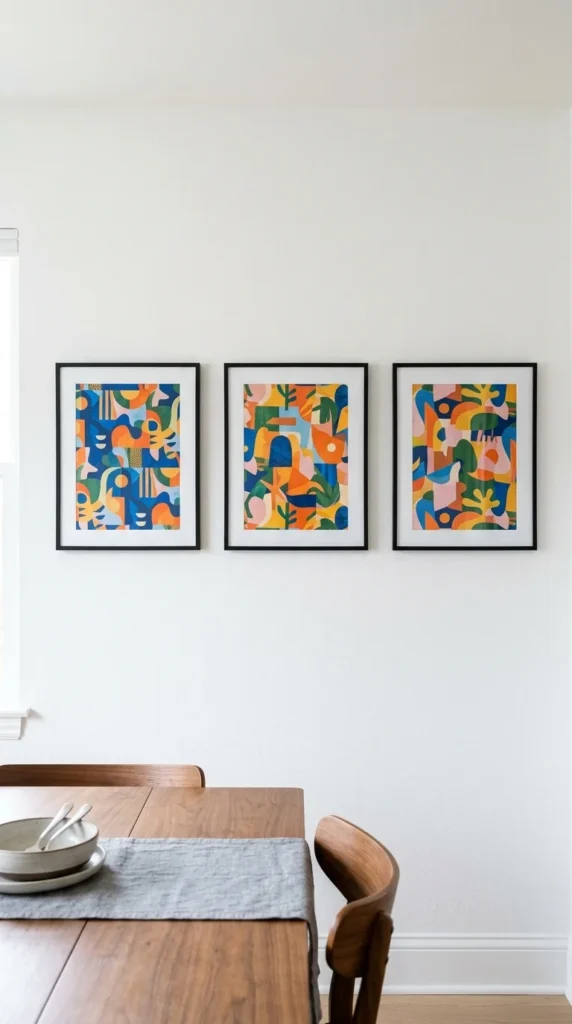
1. Create a Gallery Wall With Mismatched Frames
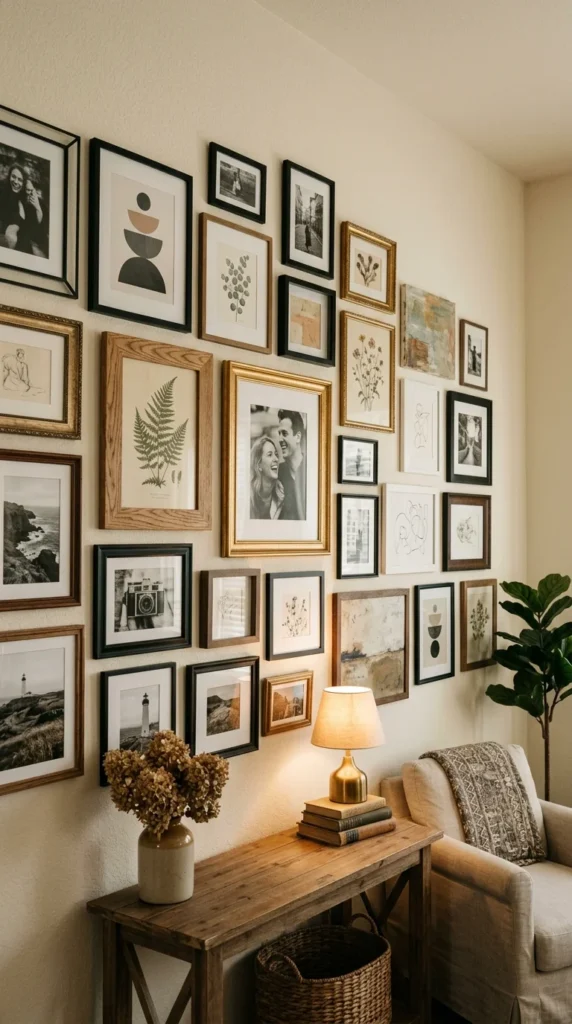
A gallery wall works even if nothing matches perfectly. That’s actually the point.
Start by collecting frames from thrift stores, dollar stores, or your own junk drawer. Mix sizes — small, medium, and large. Don’t stress about matching colors. A mix of black, gold, and wood tones looks intentional.
Lay everything out on the floor first. Arrange pieces until the group feels balanced. Then trace each frame onto kraft paper, cut it out, and tape the paper shapes to your wall before hammering a single nail.
This saves you from unnecessary holes and guesswork.
Fill the frames with whatever you love. Black-and-white photography, printed quotes, fabric swatches, kids’ drawings, postcards, or free printable art from sites like Unsplash or Canva.
Budget tip: Grab matching mats from a craft store. They make even cheap frames look polished.
The whole project can cost under $30 if you shop secondhand and print your own art at home.
2. Use Peel-and-Stick Wallpaper for an Instant Accent Wall
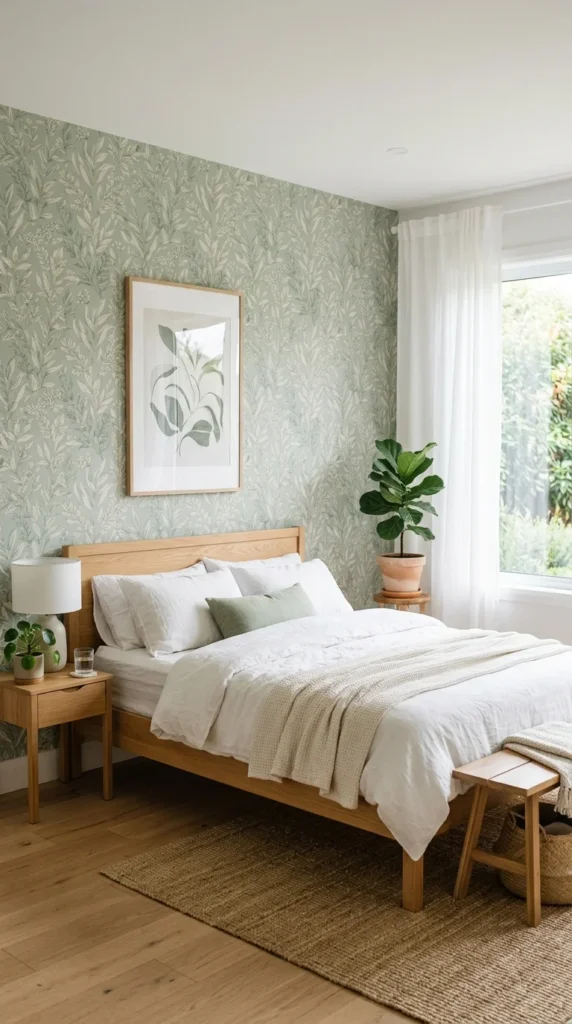
Peel-and-stick wallpaper is the renter’s best friend.
No paste. No mess. No damage to your security deposit. You apply it like a giant sticker and remove it just as easily when you’re ready for something new.
Pick one wall — usually the one behind your bed or sofa. That’s your accent wall. Covering just one surface keeps costs down and makes the pattern feel dramatic rather than overwhelming.
Measure your wall before ordering. Most peel-and-stick rolls cover about 18 square feet. Calculate how many rolls you need and add one extra for mistakes.
Patterns that work especially well include: subtle botanicals, geometric tiles, textured linen looks, and soft watercolor washes. Avoid busy patterns in small rooms — they can shrink the space visually.
Budget tip: Watch for peel-and-stick wallpaper sales on Amazon or Wayfair. Off-brand options from $12–$20 per roll often look just as good as premium brands.
Apply slowly, smooth out bubbles with a credit card, and trim edges with a sharp craft knife for clean lines.
3. Hang a Large Tapestry or Woven Wall Hanging
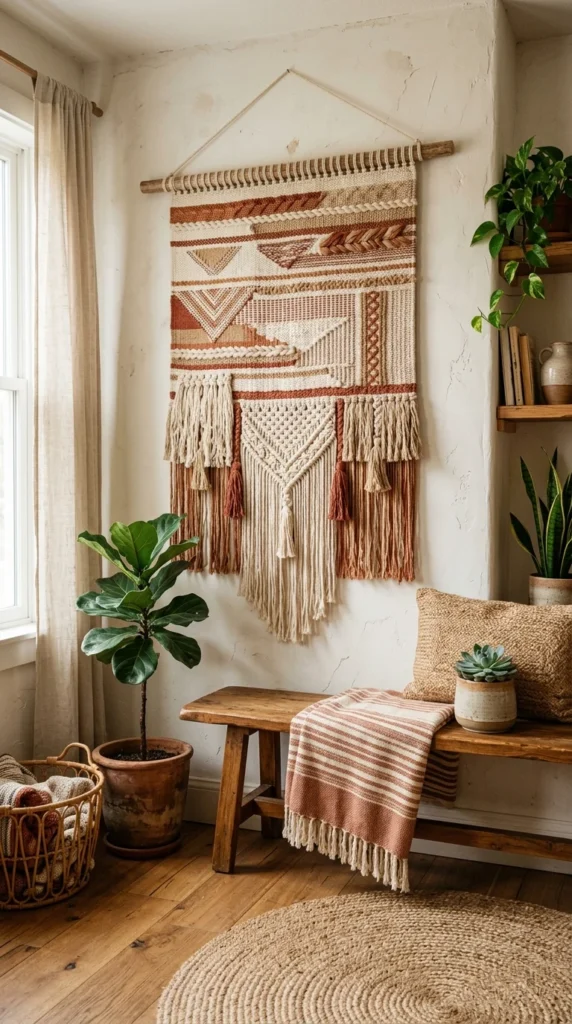
One large piece of fabric can completely anchor a room.
Tapestries and woven wall hangings are affordable, easy to hang, and instantly add warmth and texture. They work especially well in bedrooms, living rooms, and studios.
You can find good options on Etsy, Amazon, or home stores like HomeGoods. Prices range from $15 for simple cotton pieces to $80+ for handwoven macrame.
The size matters. For a sofa wall, choose something at least 4–5 feet wide. A tapestry that’s too small will look lost. Measure your wall before shopping.
Hanging options include: a wooden dowel and two nails, a curtain rod, or simple adhesive hooks for lightweight pieces.
Renter-friendly tip: Command strips rated for the weight of your piece can hold most tapestries without a single hole in the wall.
Woven textures catch light beautifully and add a layer of visual depth that flat art simply can’t match. They also absorb sound slightly — a bonus in echoey apartments.
4. Paint a Single Geometric Shape or Color Block
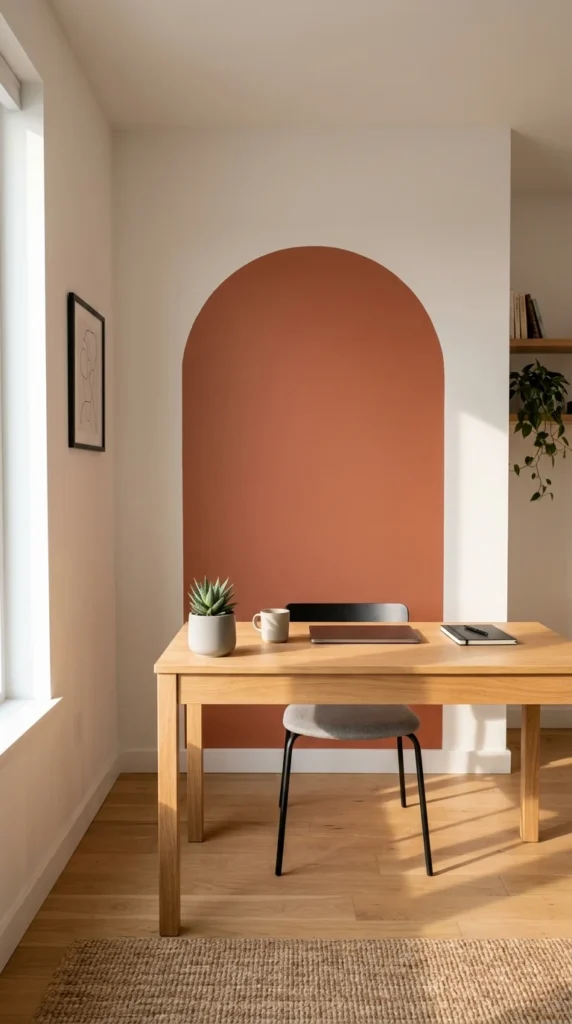
You don’t have to paint an entire room to make a big impact.
Painting one bold shape — a large arch, a half-circle, a rectangle behind a shelf — creates a focal point without requiring much paint or skill.
The most popular shapes right now are arched forms painted behind a bed, desk, or chair. They frame the space like built-in architecture.
Here’s how to do it without a steady hand:
Use painter’s tape to outline your shape. For curves, cut a piece of cardboard into an arc and trace it lightly with pencil first. Apply tape along the pencil line.
Then paint inside the tape with two coats. Peel the tape off slowly while the second coat is still slightly wet for crisp edges.
Good colors to try: deep green, terracotta, dusty pink, navy, or warm mustard. These create contrast without being overwhelming.
A sample-size paint pot from a hardware store (usually $4–$6) is often enough paint for a medium-sized shape. No need to buy a full gallon.
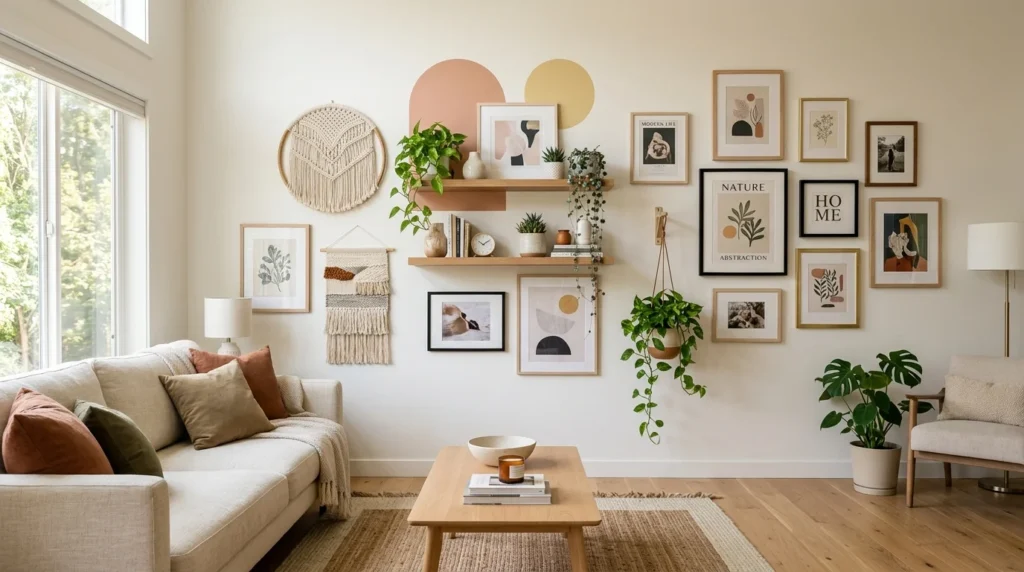
5. Build a Simple DIY Floating Shelf Display
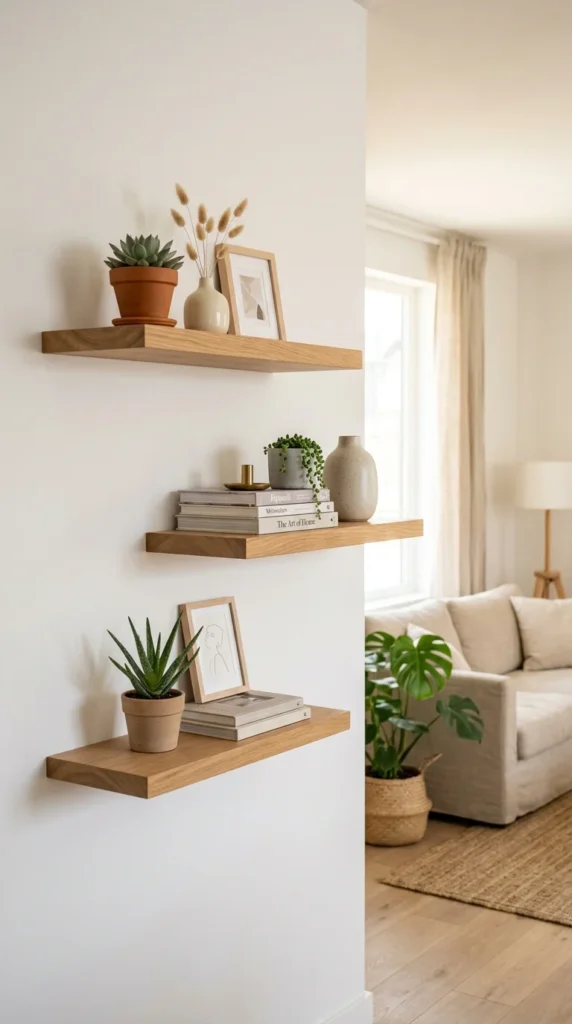
Floating shelves add both function and visual interest to any blank wall.
The trick is in the styling, not just the shelves themselves. A poorly styled shelf looks like clutter. A well-styled one looks like a curated moment.
Start with odd numbers. Groups of three objects tend to look more balanced than two or four. Vary the heights — a tall vase, a short plant, a small framed photo.
You can buy basic floating shelves from IKEA, Amazon, or hardware stores for as little as $10–$20 each. For a DIY version, cut a plank of pine or oak from the hardware store and mount it with L-brackets.
Stagger your shelves at different heights instead of lining them up evenly. This adds movement and visual rhythm to the wall.
Styling ideas: stack a few books horizontally, place a trailing plant at one end, tuck in a small candle or ceramic piece. Less is more — leave some breathing room between items.
Avoid loading shelves too heavily with trinkets. Negative space on a shelf is part of the design.
6. Frame and Hang Fabric or Wrapping Paper as Art
This is one of the most underrated budget wall art tricks around.
Bold wrapping paper, fabric yardage, wallpaper samples, or even tea towels can be stretched, mounted, or framed to look like expensive art.
Here’s the process: Buy three matching frames in the same size from a dollar store or IKEA. Choose a bold, graphic wrapping paper in a color that fits your room. Cut it to fit, pop it in the frames, and hang them in a row or triangle formation.
The result looks completely intentional — and can cost under $15 total.
Good sources for interesting paper: craft stores, Japanese import shops, bookstores (maps or vintage book pages work well), and even grocery stores during holidays.
Fabric works especially well for large openings. Stretch a piece of graphic printed cotton over a canvas frame or staple it to a piece of foam board backed with cardboard. Add a nail and you have instant oversized art.
Change it seasonally or whenever you want a refresh. The low cost makes it stress-free to experiment.
7. Create a DIY Pegboard Organizer Wall Panel
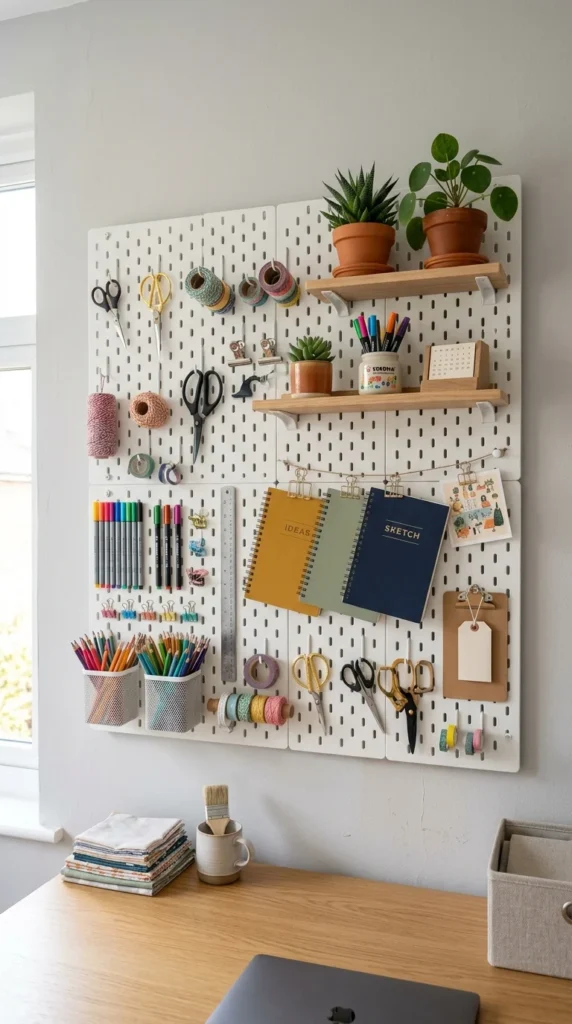
Pegboards aren’t just for garages anymore.
A painted pegboard on a living area wall is both decorative and functional. You can style it to look like a design feature while using it to store and display items you actually use every day.
Buy a standard pegboard sheet from a hardware store — usually $15–$25 for a 2×4 foot panel. Sand it lightly, then paint it any color you like. White, black, and sage green are popular choices.
Mount it on the wall using standoffs (small spacers that hold the board a half-inch from the wall so hooks can fit behind it). Most hardware stores sell pegboard mounting kits.
Add a mix of hooks, small shelves, and bins. Style it with plants, art supplies, keys, headphones, small baskets — whatever fits your life.
In a kitchen, it’s perfect for hanging utensils and small jars.
In a bedroom or studio, it can hold jewelry, notebooks, and cables.
The beauty is that it’s completely reconfigurable. Rearrange it anytime without tools or new holes.
8. Install a DIY Shiplap or Plank Wood Feature Wall
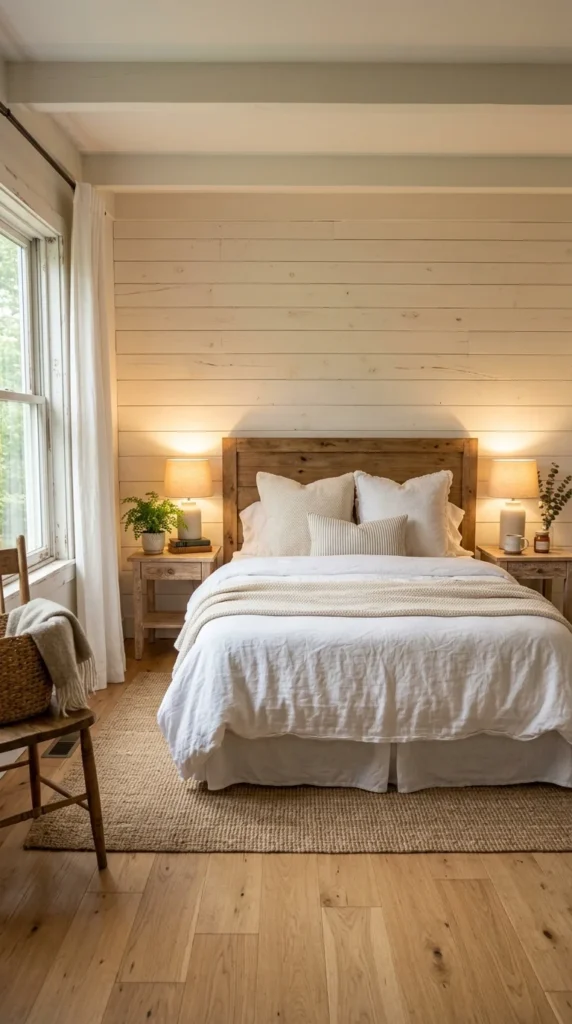
Wood plank walls have a warm, textural quality that no paint can fully replicate.
And you don’t need to be a carpenter to pull this off.
The easiest method uses thin pine planks (usually 1×4 or 1×6 boards) from a hardware store. Cut them to wall width, paint or stain them your desired color, then nail or glue them to the wall in horizontal rows with small gaps between each plank.
A full shiplap accent wall typically costs $50–$150 in materials depending on room size and the type of wood.
For renters, there’s an even easier option: peel-and-stick wood plank panels that look nearly identical to the real thing. They go up in minutes and come down cleanly.
You can also use reclaimed wood from salvage stores or Facebook Marketplace. The imperfections add character.
This works especially well behind a bed, sofa, or in an entryway. Paint the planks white for a classic farmhouse feel, leave them natural for a Scandinavian look, or go dark walnut for a moody vibe.
9. Hang a Collection of Mirrors in Different Shapes
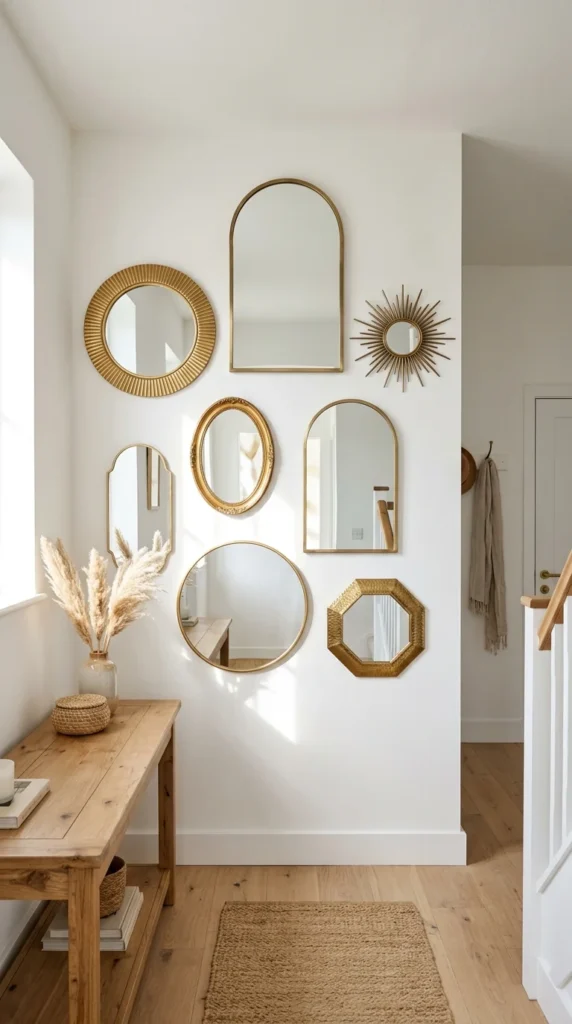
Mirrors do two things flat art can’t: they reflect light and make a room feel larger.
A single mirror is functional. A thoughtful arrangement of mismatched mirrors becomes a statement wall.
Mix shapes — round, arched, sunburst, rectangular, and hexagonal. You don’t need expensive pieces. HomeGoods, TJ Maxx, and IKEA carry affordable mirrors in interesting shapes. Even dollar stores often carry small round mirrors perfect for a cluster arrangement.
The key is planning your layout first. Lay all your mirrors on the floor. Move them around until you find an arrangement that feels balanced but not too uniform. Then trace each shape onto paper, tape to the wall, step back, and adjust.
Hang the largest piece first and build around it.
Budget tip: Thrift stores are goldmines for unique mirrors. A quick coat of spray paint in gold, black, or white can unify an otherwise random collection.
In a dark hallway or small room, a mirror wall arrangement amplifies natural light significantly — making the space feel open and airy without any structural changes.
10. String Up Lights Behind Sheer Fabric Panels
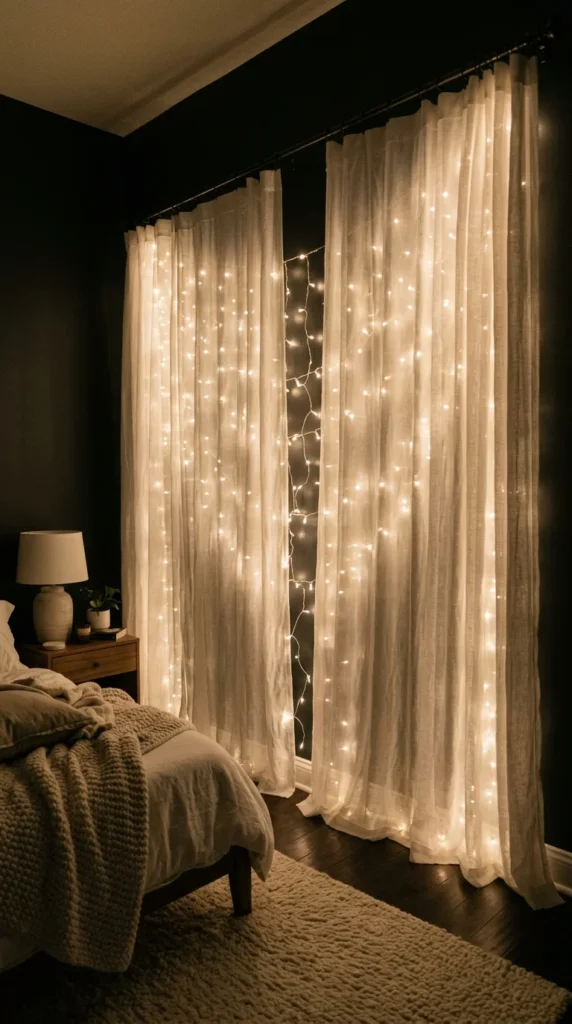
This idea is simple, inexpensive, and creates an almost magical effect.
Hang sheer white or cream curtain panels across a wall — floor to ceiling if possible. Then string fairy lights (warm white LED strands) behind the fabric between the curtains and the wall.
When the lights glow through the sheer fabric, the effect is warm, diffused, and dreamlike.
This works best in bedrooms and living rooms. It softens the wall completely, adds warmth at night, and creates the feeling of depth on an otherwise flat surface.
What you need:
- Curtain rod or tension rod near the ceiling
- Sheer curtain panels (IKEA has affordable options)
- LED fairy light strings or plug-in LED strip lights
Total cost can be under $30–$40.
Layer it further by placing a small shelf or artwork in front of the curtain panels. The lit backdrop makes anything placed in front of it look like it’s floating.
This approach is especially useful for walls near electrical outlets where you don’t want to bother with complex hanging.
11. Mount a Living Plant Wall or Vertical Garden Frame
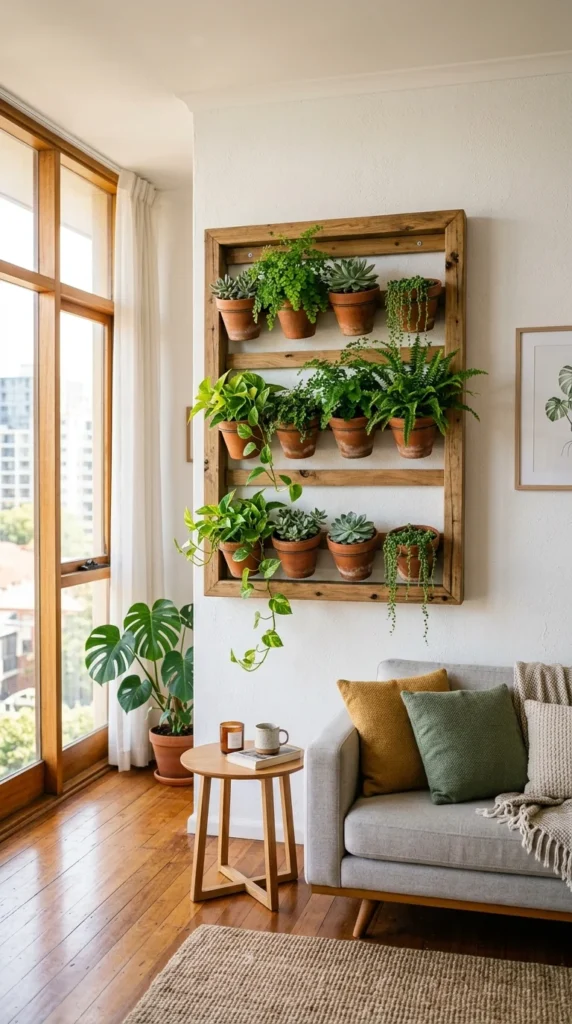
Plants don’t have to sit on the floor or a shelf. They can become the wall.
A vertical plant wall adds color, texture, and life to any room — and real plants improve air quality as a bonus.
The simplest version uses a wall-mounted wooden grid or dowel rack. Hang small pots or planters from hooks on the grid. Another option is a pocket planter felt panel — fabric pouches stitched into a hanging panel where small plants or herbs sit in each pocket.
You can buy vertical garden panels online for $20–$50, or make your own with a wooden pallet, some mesh, and small pots.
Best plants for indoor vertical gardens:
- Pothos (nearly indestructible)
- Air plants (no soil needed)
- Ferns (love humidity)
- Small succulents
- Herbs like basil and mint near kitchen windows
Water regularly — vertical planters dry out faster than floor pots.
Budget tip: Propagate cuttings from existing plants instead of buying new ones. Pothos, for example, roots in water within a few weeks and costs nothing.
12. Apply Wall Decals or Vinyl Stickers for Instant Pattern
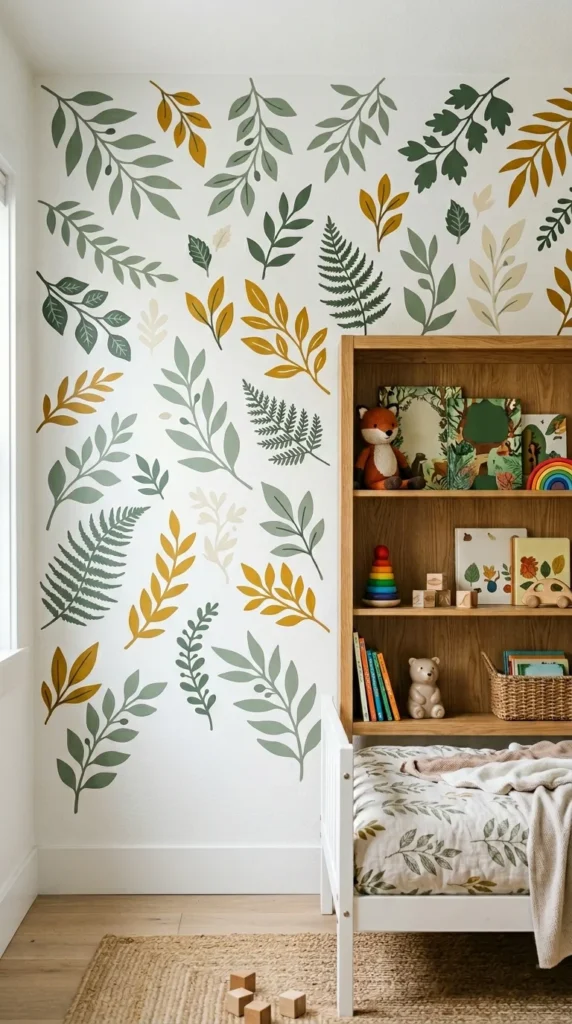
Wall decals are the zero-commitment way to add pattern and personality to any wall.
They’re especially useful for renters — most peel off cleanly when it’s time to move. And unlike wallpaper, you can apply them one at a time, creating a custom arrangement that grows with your style.
They’re available in nearly every category: botanical leaves and branches, abstract geometric shapes, stars and moons, animals, quotes, abstract splashes, and architectural details.
How to apply without bubbles:
- Clean the wall surface first
- Peel the backing off slowly
- Apply one section at a time, smoothing with a credit card from the center out
- Use a hair dryer on low heat to help adhesion on textured walls
Cost: You can find large packs of decals for $10–$25 on Amazon or Etsy. For a custom look, many Etsy sellers cut custom vinyl shapes from any design you send them.
Works especially well in nurseries, kids’ rooms, and rental apartments where permanent changes aren’t allowed.
For adults, abstract line art decals and minimal botanical designs feel sophisticated without looking childish.
13. Build a DIY Macrame Wall Hanging
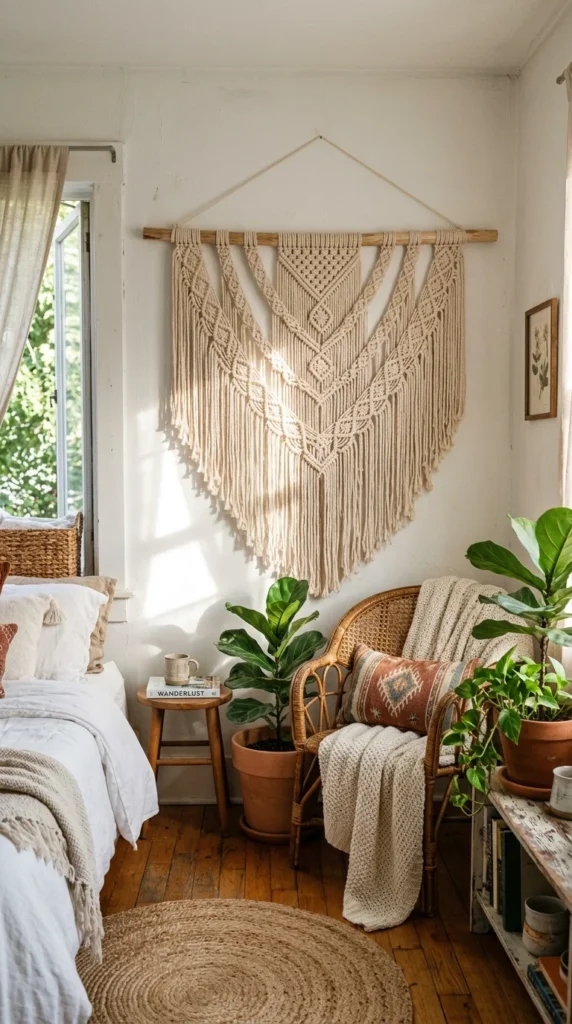
Macrame is having a sustained moment — and for good reason.
A large handmade macrame piece adds texture, warmth, and handmade character that store-bought art rarely achieves. And it’s not as hard to make as it looks.
Basic supplies: 3–5mm natural cotton macrame cord (sold by the spool), a wooden dowel, and scissors. A beginner 24-inch wide wall hanging might use one 100-meter spool of cord — which costs around $10–$15.
The most common beginner knots are the square knot and the half-hitch. With just these two, you can create dozens of patterns.
YouTube has hundreds of free macrame tutorials for complete beginners. A basic 16-inch hanging can be completed in 2–3 hours on your first try.
No dowel? No problem. Use a piece of driftwood, a thick stick from your yard, or a length of copper pipe for an industrial look.
The finished piece can hang on a single nail or a small hook.
For extra texture, brush out the bottom fringe with a pet slicker brush to create a soft, fluffy fringe effect that looks professionally made.
14. Display Books as Art With Floating Shelves and Color Coordination
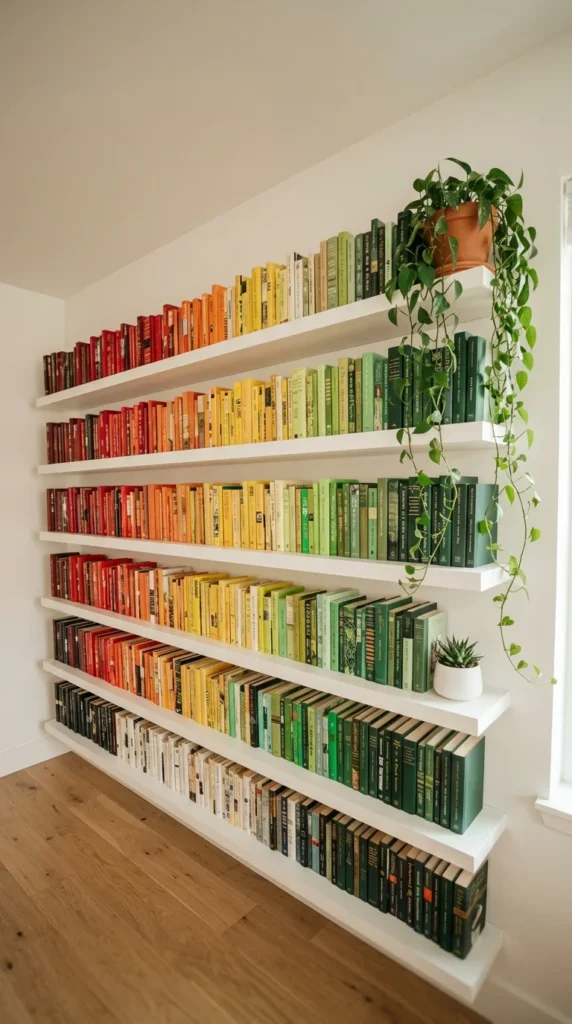
Books are art. Most people just don’t display them that way.
Arranging your books by spine color transforms a collection into a visual gradient display that looks designed and intentional. No new purchases required — just reorganize what you already own.
How to do it: Pull all your books off the shelf. Sort them into color groups — deep blues and greens together, warm reds and oranges, whites and creams, blacks. Then arrange them back on the shelf in color order, like a spectrum.
This works even better with floating shelves at different heights rather than a single bookcase.
Add visual interest by layering books with small objects: a plant at one end, a candle, a small sculpture. Stacking a few books horizontally (spine facing out) between upright books adds rhythm.
Turn books with worn or ugly spines backward — the cream page edges create a clean textured look that’s popular in styled interiors.
Budget tip: This idea costs nothing if you already own books. Adding floating shelves from IKEA adds minimal cost but maximum visual impact.
15. Hang Textile Art or Embroidery Hoop Arrangements
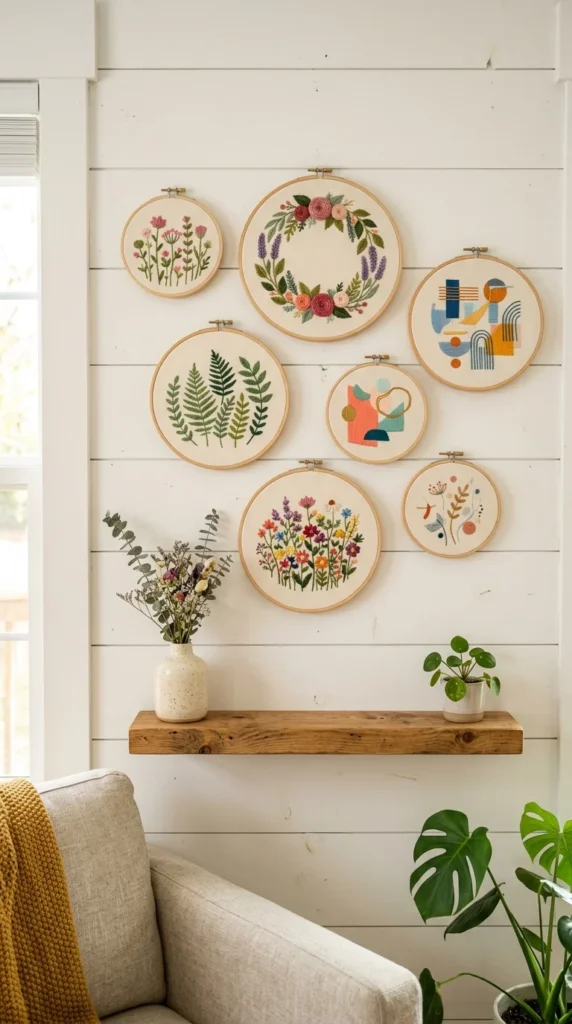
Embroidery hoop art is budget-friendly, deeply personal, and surprisingly striking in a grouped arrangement.
You can buy finished embroidery hoops on Etsy for $10–$30 each, or make your own with a hoop, some linen or muslin fabric, embroidery floss, and a needle. Beginner kits cost as little as $8 and come with everything you need.
Ideas for what to stitch:
- Simple botanical illustrations (leaves, branches, small flowers)
- Geometric patterns
- Abstract lines and shapes
- Small animals or celestial motifs
To hang multiple hoops as a wall arrangement, use the same floor-layout planning method as a gallery wall. Vary sizes — a 12-inch hoop, two 8-inch ones, and three 5-inch ones creates visual hierarchy.
Hang them with small nails or adhesive hooks. Hoops are lightweight, so even picture-hanging strips work well.
The mix of handmade texture, warm fabric tones, and organic shapes makes this arrangement feel cozy and artisan without feeling cluttered.
Change out the fabric inserts seasonally to refresh the look without buying new frames.
16. Use a Chalkboard or Whiteboard Panel as a Functional Feature Wall
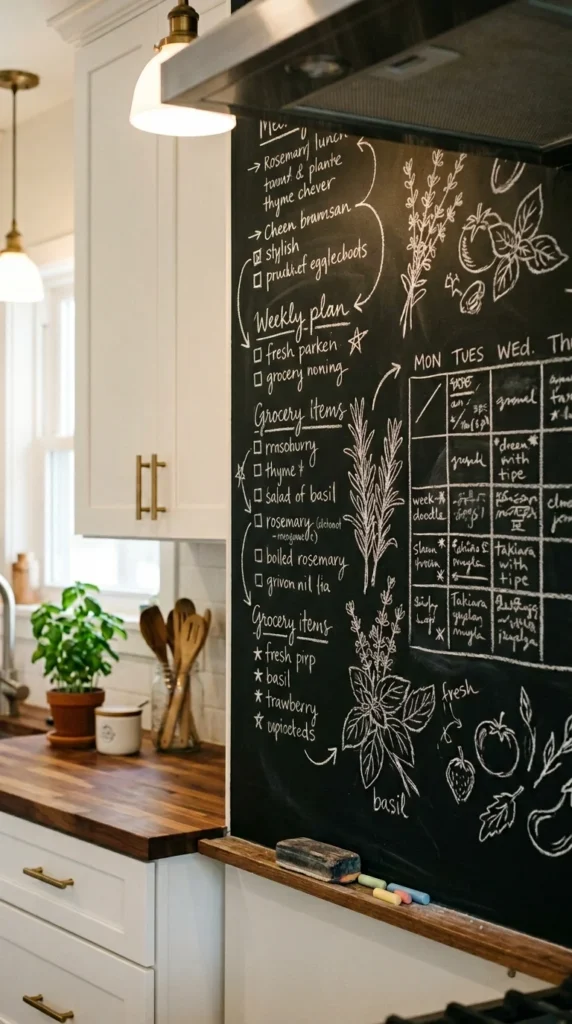
A chalkboard wall serves double duty — it’s art you change every week.
All it takes is chalkboard paint, which is available at any hardware store for around $10–$15 per quart. Roll it onto any smooth wall section, let it cure for 24 hours, and you have a fully functional writing surface.
It works beautifully in:
- Kitchens (for meal planning and grocery lists)
- Home offices (for brainstorming and to-do lists)
- Playrooms (kids love it)
- Entryways (for messages and reminders)
You’re not limited to black. Chalkboard paint also comes in dark green, navy, and even clear (which turns any surface into a chalkboard without changing the color).
To make it look more finished, frame the chalkboard area with thin wooden trim strips painted white or in a contrasting color.
For a smaller version, mount a large pre-primed chalkboard panel (sold at craft and art stores) directly to the wall like a frame.
Budget tip: Use chalk markers instead of regular chalk for cleaner lines and less dust — especially for decorative drawings you want to keep for weeks at a time.
Conclusion
Blank walls don’t have to stay blank — and fixing them doesn’t require a big budget or professional help. Whether you spend $10 on wrapping paper frames or an afternoon making macrame, every idea here is something a real person can pull off this weekend. Start with the one that excites you most. Pick up a few supplies, follow the simple steps, and see how quickly a bare space becomes something you actually enjoy looking at. One good wall can change how a whole room feels — and it’s always worth the effort.