18 Smart Small Bathroom Tricks That Make Tiny Spaces Feel Huge
A small bathroom doesn’t have to feel like a closet with a toilet. The right combination of layout tricks, lighting choices, and storage solutions can make even the tiniest bathroom feel open, calm, and well-designed. Most people assume square footage is the problem — but it’s almost never about size. It’s about how the space is organized, lit, and styled. Whether you’re working with a 40-square-foot rental bathroom or a cramped ensuite that came with your home, these 18 practical tricks will help you see your small bathroom differently — and transform it without a full renovation.
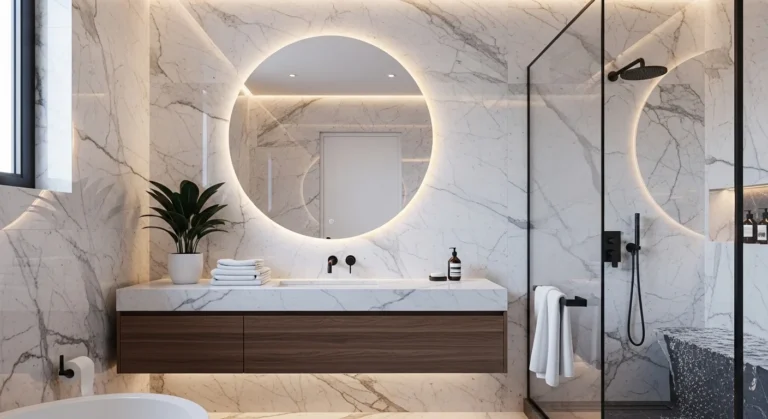
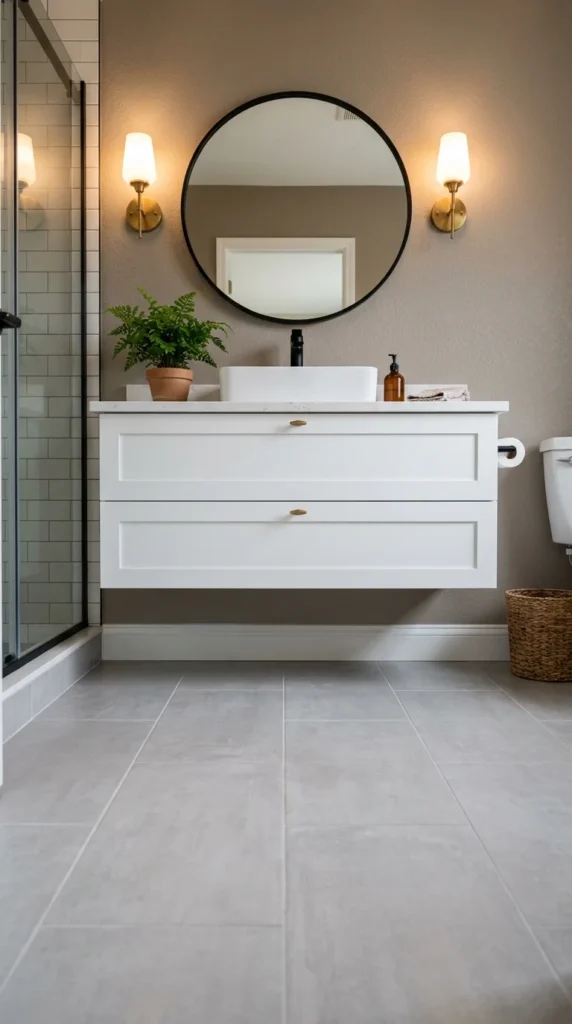
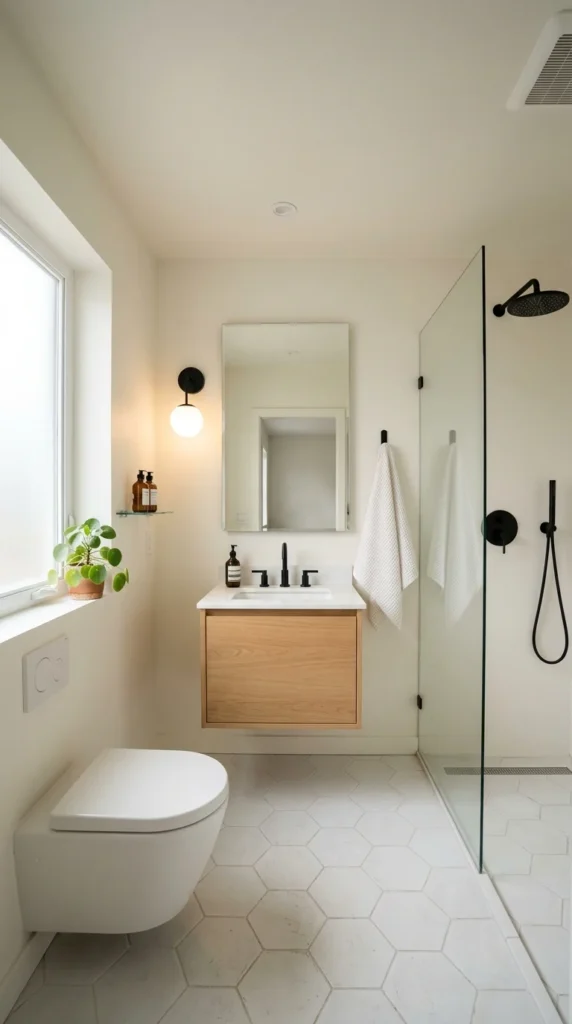
1. Mount a Floating Vanity to Expose the Floor
Most small bathrooms have a bulky floor-mounted vanity that visually cuts the room in half.
A floating vanity — mounted directly to the wall — exposes the floor beneath it, making the entire room feel larger and more open.
When the eye can see the floor uninterrupted, the brain reads the space as bigger than it actually is. It’s a simple visual trick with real impact.
Options at different price points:
- IKEA GODMORGON wall-mounted vanity: $200–$400
- Amazon floating bathroom cabinet with sink: $150–$350
- Custom built by a carpenter using wall-mount brackets: $100–$200 in materials
What to look for:
- Soft-close drawers for a quiet, quality feel
- A single-hole faucet mount to simplify installation
- A finish that matches your floor color (contrast creates visual noise)
Installation tips:
- Always mount into wall studs or use toggle bolts rated for the weight
- Standard height is 32–36 inches from floor to countertop
- Hire a plumber only for reconnecting drain and supply lines — the mounting itself is DIY-able
The exposed floor space changes the entire feel of the room. Even 6–8 inches of visible floor beneath a vanity makes a measurable visual difference in how spacious the bathroom feels.
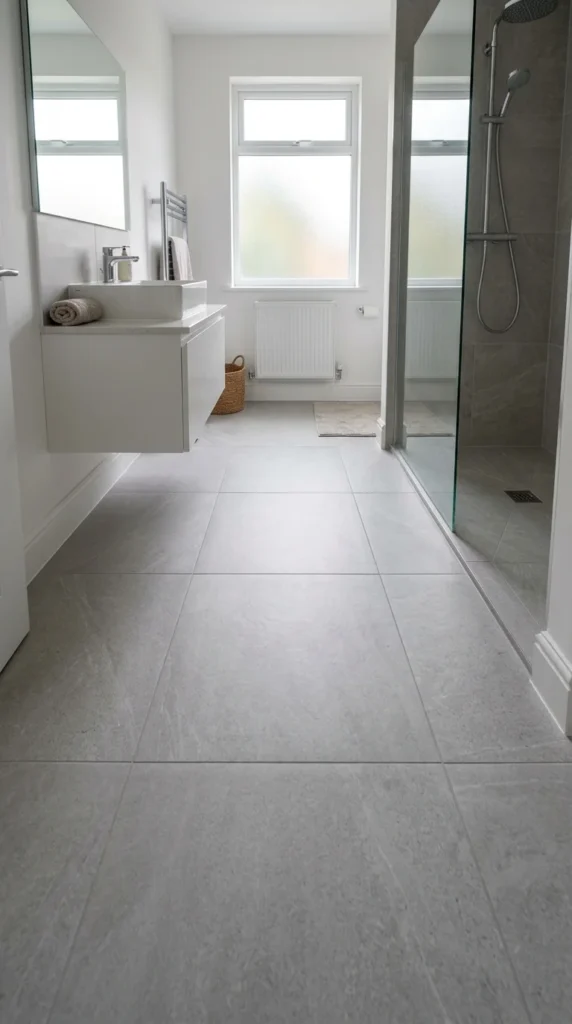
2. Use a Large Format Floor Tile
Small tiles on a small floor create a lot of grout lines. And every grout line is a visual break that chops the floor into tiny fragments — making the space feel smaller.
Large format tiles (18×18 inches or bigger) have fewer grout lines, which means the floor reads as one continuous surface — and that makes the room feel bigger.
Best tile sizes for small bathrooms:
- 18×18 inch: good starting point, major improvement over 12×12
- 24×24 inch: ideal for most small bathrooms
- 12×24 inch in a staggered pattern: elongates the floor visually
Best colors for small bathrooms:
- Light grey (most popular — clean and versatile)
- Warm white or cream (brightens the floor)
- Soft beige or sand (warm and grounding)
- Pale blush (feminine and spa-like)
Avoid:
- Very dark tiles (absorb light, shrink the space visually)
- High-contrast grout (creates a grid pattern that emphasizes boundaries)
Match your grout color to your tile color — this is the single most important tiling tip for small spaces. It eliminates visual grid lines and makes the floor look seamless.
Budget option: Vinyl plank flooring in large panels mimics tile, is water-resistant, and costs $1–$3 per square foot installed.
3. Install a Frameless Glass Shower Enclosure
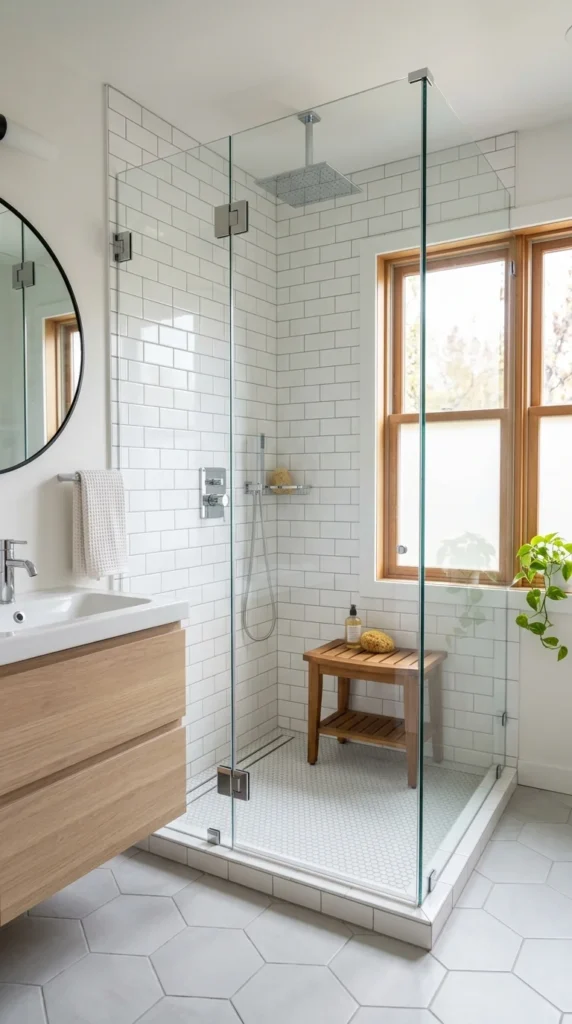
A shower curtain is practical — but it’s also a visual wall. It blocks your line of sight, cuts the bathroom in half, and makes the room feel closed in.
A frameless glass shower enclosure removes that visual barrier entirely. Your eye travels straight through the glass to the tile behind it — and the bathroom suddenly feels twice as large.
Why frameless specifically:
- Metal-framed enclosures add visual weight and lines
- Frameless glass has zero interruption — it’s practically invisible
- The shower tile becomes visible from anywhere in the bathroom, adding perceived depth
Cost range:
- Full frameless custom enclosure: $800–$2,000 (professional install)
- Semi-frameless fixed panel + door: $400–$800
- Budget option: A clear (not frosted) curved rod with a clear PEVA shower liner: $20–$40
The cheapest version — a clear liner on a straight or curved rod — still removes the visual wall effect. Always choose clear over opaque in a small bathroom. Even a $15 clear liner from Amazon does more visual work than an expensive patterned curtain.
If a full enclosure isn’t in the budget right now, start with clear liner and a ceiling-mounted straight rod that draws the eye upward. It’s an immediate improvement.
4. Paint the Walls and Ceiling the Same Color
Most people paint the ceiling white and the walls a color. This creates a visible line where the wall meets the ceiling — a horizontal boundary that caps the room and makes it feel lower and smaller.
Painting the ceiling and walls the exact same color removes that boundary line and wraps the room in one continuous tone. The eye doesn’t know where the wall ends and the ceiling begins — and the space feels taller and more expansive as a result.
Best colors for this technique in small bathrooms:
- Soft warm white (Benjamin Moore White Dove, Sherwin-Williams Alabaster)
- Pale greige (warm grey-beige — works with everything)
- Very soft sage green (organic, spa-like)
- Dusty blush (feminine, gentle, warm)
What to avoid:
- Very dark colors (can feel oppressive in a tiny room)
- High-gloss finish on walls (shows every imperfection)
Use an eggshell finish on walls and a flat or matte finish on the ceiling. Same color, slightly different sheen — the ceiling looks intentional without being shiny.
Cost: One quart of paint covers most small bathroom walls and ceiling ($10–$20). This is the cheapest, highest-impact trick on this entire list.
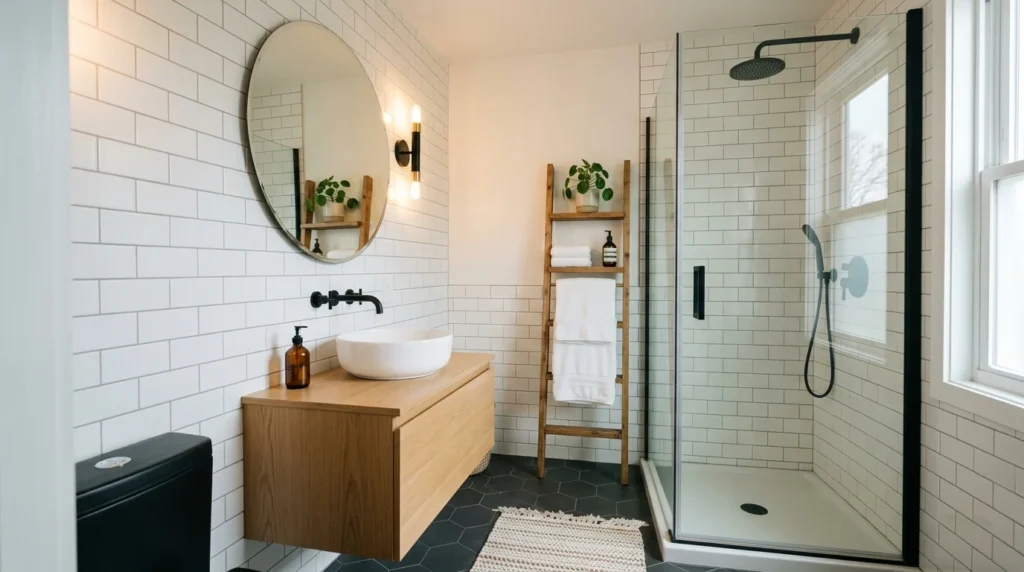
5. Add a Tall Ladder Shelf for Vertical Storage
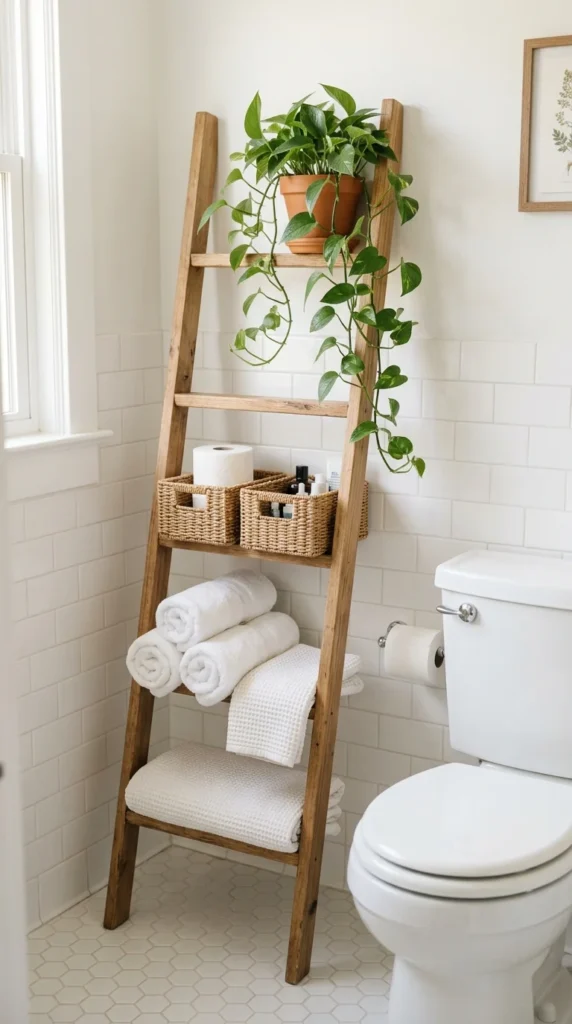
When floor space is limited, the only direction left is up. And a ladder shelf is one of the most elegant ways to use vertical space without making a small bathroom feel cluttered.
A slim ladder shelf leans against the wall, requires zero installation, and holds a surprising amount without taking up more than 12–18 inches of floor space.
What to store on a ladder shelf:
- Rolled towels on lower rungs
- Small wicker baskets for toiletries and cotton balls
- Candles, a small plant, or a diffuser for styling
- Spare toilet paper rolls in a small bin
- A folded robe on the top rung
Best options by budget:
- IKEA YPPERLIG bamboo ladder shelf: $30–$50
- Amazon Natural Wood Ladder Shelf (5-tier): $35–$60
- Target Brightroom wood-look shelf: $40–$65
- DIY: Two 1×2 lumber rails + wooden dowels from Home Depot: under $20
Style tips:
- Keep towels in one color only (white or cream)
- Use matching baskets on two rungs — don’t mix styles
- Add one trailing plant (pothos or ivy) on the top for life and movement
A ladder shelf in a bathroom also works as a styling moment — functional and beautiful at the same time.
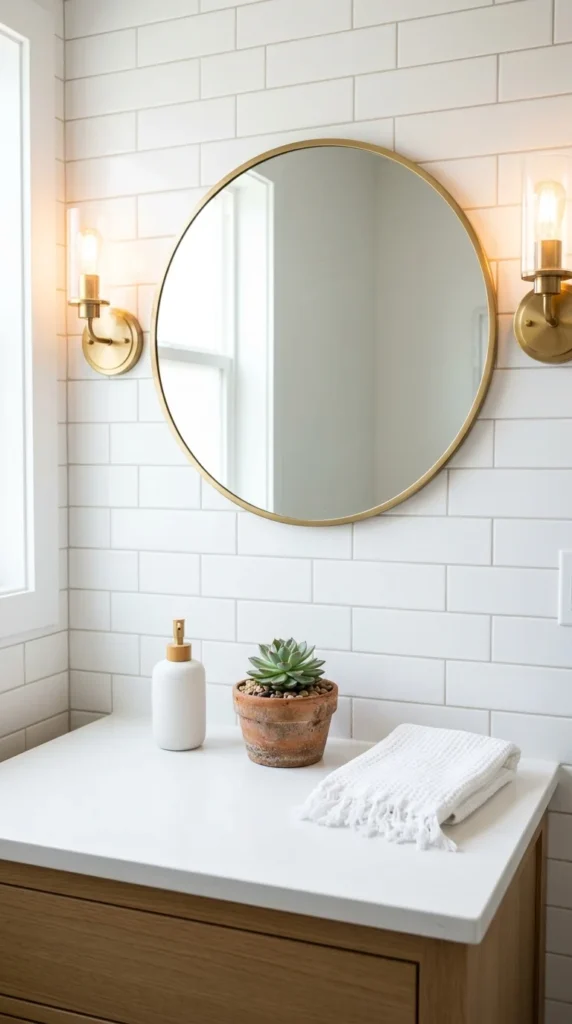
6. Replace a Builder Mirror With a Round or Arched Mirror
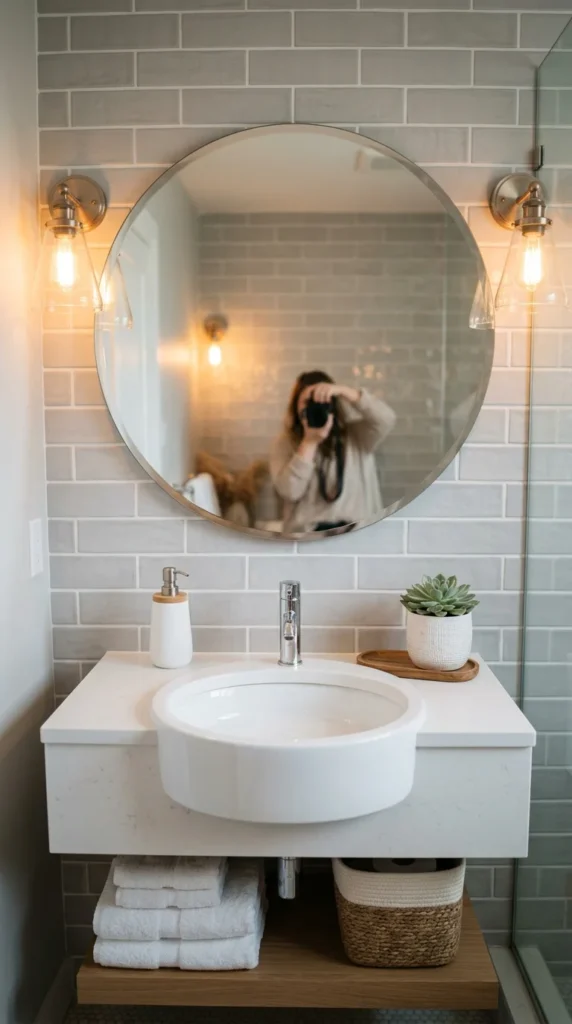
The long rectangular mirror that came with your bathroom — the one that spans the full width of the vanity — is one of the easiest things to swap for an immediate visual upgrade.
A round or arched mirror adds softness, breaks the grid of rectangular lines in a bathroom, and reflects light in all directions — making the room feel airier and more designer-curated.
Why round or arched works better in small spaces:
- Circular shapes contrast with the straight lines of tile, vanity, and walls
- The contrast creates visual interest and stops the room from feeling boxy
- Light reflects in a wider angle from a curved mirror
Best options:
- IKEA LINDBYN round mirror (gold frame, 24 inch): $50
- Amazon black-framed round mirror (various sizes): $30–$80
- Arch-top mirror with brass frame: $60–$120 on Amazon or Wayfair
- Thrift store find + spray-painted frame: $10–$20
Size tip: Go bigger than you think. A 24–30 inch round mirror above a 24-inch vanity looks proportional. A tiny mirror on a big wall looks like an afterthought.
A large round mirror also doubles the light in the room by reflecting the window or light fixture back into the space — making a dim bathroom feel noticeably brighter without adding a single new light source.
7. Use Recessed Shelving Inside the Shower Wall

Shower caddies hang from the showerhead, collect rust and mildew, and visually clutter one of the smallest spaces in your bathroom.
A recessed shower niche — a shelf built directly into the wall — stores everything flush with the surface, keeping the shower visually clean and open.
If you’re renovating, this is a standard addition any tiler can add. If you’re not renovating, there are still options.
For renovation projects:
- Standard niche size: 12×24 inches, between two studs
- Cost to add during tile installation: $100–$300 in labor
- Line it with the same tile as the shower for a seamless look
- Add a marble or stone tile accent inside the niche for visual interest
For renters or non-renovators:
- Surface-mounted tile-look shelves that adhere to existing tile: $20–$40
- A corner tension pole shelf (no drilling): $15–$30 on Amazon
- Magnetic shower shelves that attach to metal shower walls: $15–$25
The key visual principle: anything that projects into the space makes it feel smaller. Anything that recedes into the wall makes it feel larger. A niche is the ultimate application of this idea — your storage literally disappears into the wall.
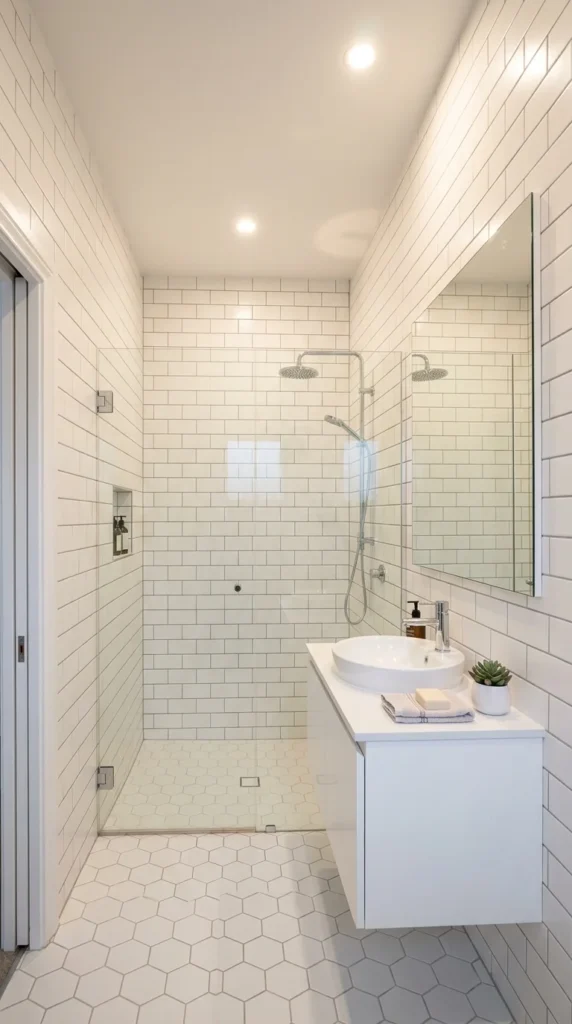
8. Choose a Pedestal Sink or Wall-Mount Sink
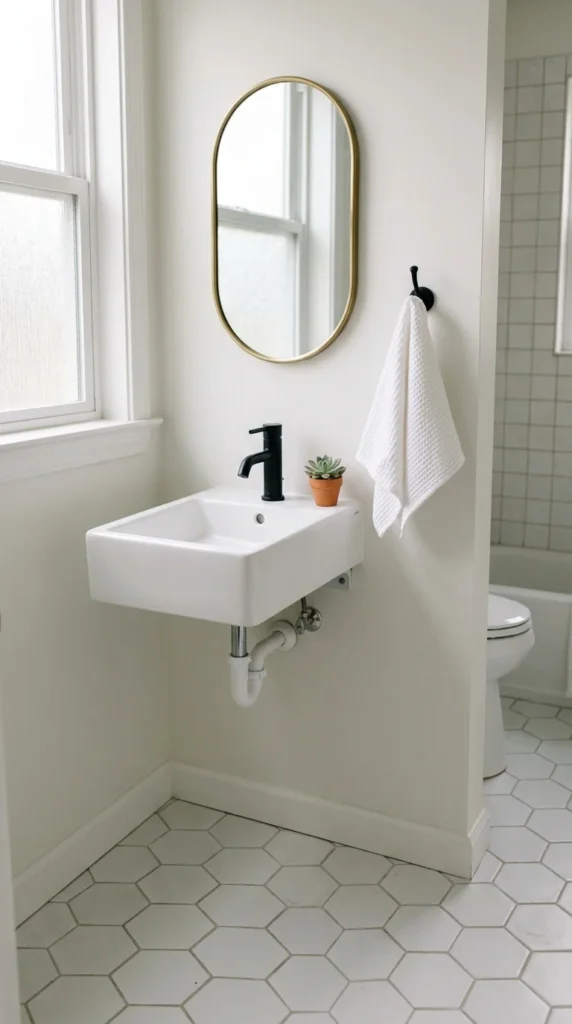
Bulky vanity cabinets take up visual and physical space. In a very small bathroom — especially a powder room or secondary bath — a pedestal or wall-mounted sink creates an immediate sense of openness.
When the floor is fully visible beneath the sink, the room breathes. It’s the same principle as a floating vanity, but even more minimal.
Pedestal sink pros:
- Classic, timeless look
- Very affordable ($80–$200 at Home Depot)
- Easy to install — connects to existing plumbing
- Works beautifully in traditional, farmhouse, or vintage-style bathrooms
Wall-mount sink pros:
- Ultra-modern and minimal
- Adjustable height (great for households with varying needs)
- Floor completely clear — maximum visual openness
- $100–$400 depending on style
The trade-off: both options sacrifice under-sink storage. Compensate with:
- A tall ladder shelf (tip #5)
- Recessed medicine cabinet (tip #9)
- Over-toilet storage unit
- Small wicker baskets on a floating shelf nearby
In a powder room or half-bath, storage is minimal anyway — a pedestal or wall-mount sink is a straightforward choice with no real downside and a significant visual payoff.
9. Install a Recessed Medicine Cabinet
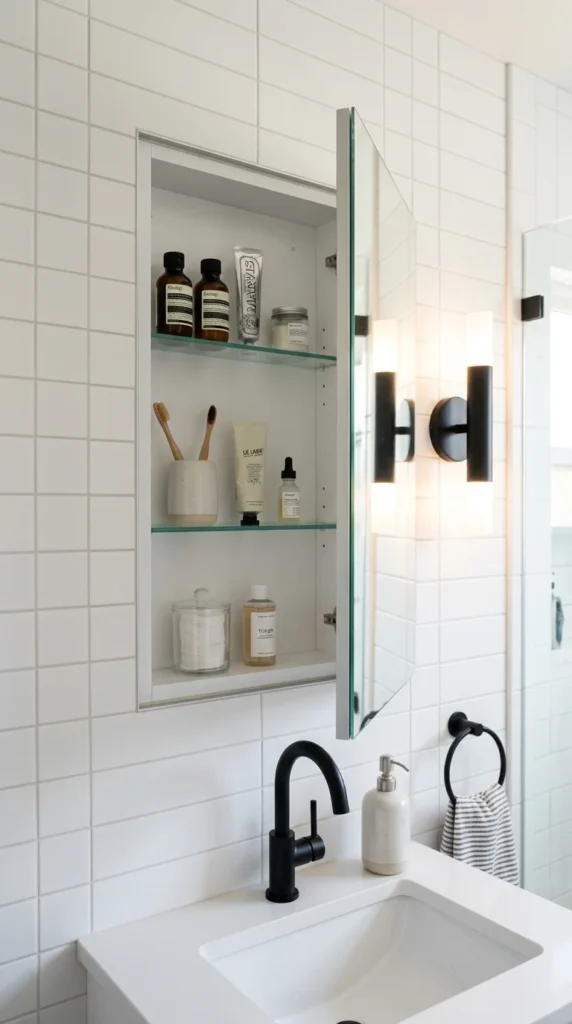
A surface-mounted medicine cabinet sticks out 4–6 inches from the wall. In a small bathroom, those inches matter — and they create visual bulk that makes the room feel tighter.
A recessed medicine cabinet sits flush with the wall — you gain 4–6 inches of storage depth without losing a single inch of bathroom space.
What it stores:
- Medications and first aid supplies
- Toothbrush and toothpaste
- Cotton rounds, Q-tips, small toiletries
- Skincare products organized by routine
Installation basics:
- Fits between two standard wall studs (14.5 inches wide)
- For wider cabinets (24–30 inches), a stud may need to be cut and a header added
- Best installed during renovation — but possible in any drywall wall as a retrofit
Recommended options:
- Kohler Verdera recessed medicine cabinet: $150–$300
- Fresca recessed mirrored cabinet: $80–$150 on Amazon
- Home Depot glacier bay recessed cabinet: $60–$100
The mirror on the front serves double duty — it stores items AND reflects light and space, making it one of the most space-efficient additions you can make to a small bathroom.
If a full recessed cabinet isn’t possible, a surface-mounted mirrored cabinet is still far better than none — the mirror alone adds perceived depth.
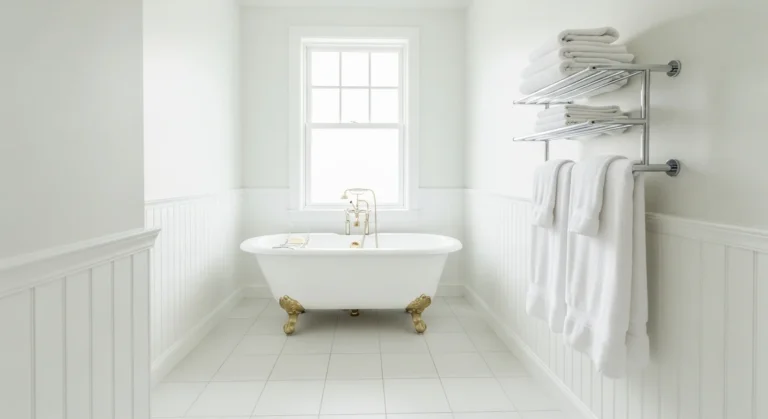
10. Hang Towels Vertically Instead of Folded
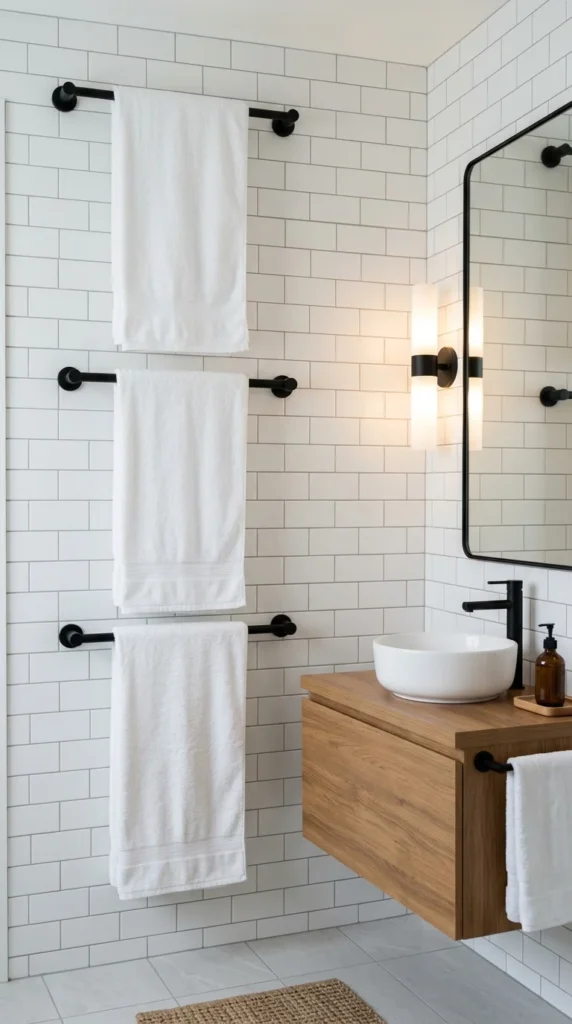
Most people fold towels over a horizontal bar — which creates wide, horizontal shapes on the wall. Horizontal lines make a room feel shorter and wider.
Vertical towel arrangements draw the eye upward, making walls feel taller and ceilings feel higher.
How to hang towels vertically:
- Use a long single towel bar (18–24 inches) mounted vertically instead of horizontally
- Fold the towel lengthwise and drape it so it hangs in a long vertical column
- Use a hook instead of a bar — hang the towel by its corner so it falls in a long triangle
Other vertical towel display ideas:
- A wall-mounted towel ring placed high on the wall
- Stacked hooks on a vertical wooden plank (mount plank to wall)
- A floor-to-ceiling tension rod in a corner with S-hooks
This costs nothing if you already have towel bars — just remount them vertically. A single towel bar from Amazon or IKEA costs $10–$25 if you’re starting fresh.
Color matters too: stick to white or neutral towels in a small bathroom. Bright-colored or heavily patterned towels add visual noise to an already tight space. White reads clean and makes the room feel larger.
11. Use Mirrors on More Than One Wall
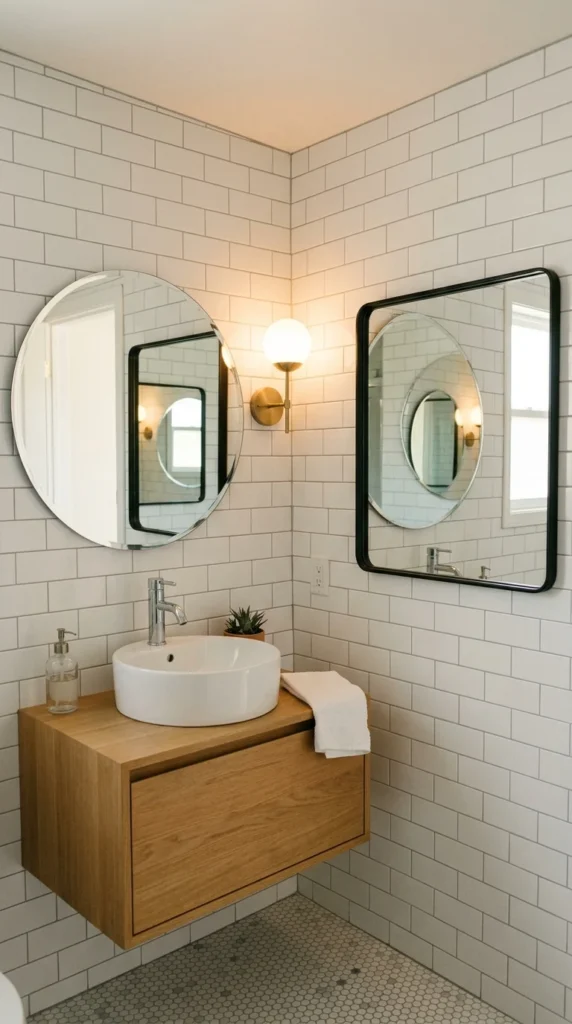
One mirror is standard. Two mirrors create something special — they reflect each other, multiply light, and make a small bathroom feel like it extends in multiple directions.
Placing mirrors on two walls creates infinite visual depth — the reflections bounce between surfaces and the room suddenly feels much larger than its actual dimensions.
How to do it without making it look like a funhouse:
- Keep the mirrors in different shapes (round main mirror + rectangular accent mirror)
- Use the same or complementary frame finishes
- Don’t face mirrors directly opposite each other — angle the second mirror slightly
- Place the second mirror on the wall adjacent to the vanity mirror, not directly opposite
Ideas for the second mirror:
- A small decorative mirror above the toilet
- A slim vertical mirror on a narrow wall between the door and shower
- A vintage thrifted mirror ($5–$20) with an interesting frame as an accent piece
The goal isn’t symmetry — it’s light multiplication. Every mirror in a bathroom reflects the window, the light fixture, and the open space — doubling the perceived brightness and size of the room without changing a single physical dimension.
This trick costs $15–$50 for a simple accent mirror and takes 20 minutes to install.
12. Go Floor-to-Ceiling With Tile
Most bathrooms tile partway up the wall — usually to 4 or 5 feet — and paint the rest. This creates a horizontal line across the room that cuts the wall in half and makes the ceiling feel lower.
Running tile from floor to ceiling removes that horizontal line entirely. The eye follows the vertical surface all the way up — and the room feels taller.
This works especially well with:
- Subway tile in a vertical stack bond (bricks running vertically instead of horizontally)
- Large format tiles (fewer grout lines = cleaner vertical pull)
- Narrow mosaic tiles running vertically in a stripe pattern
Budget considerations:
- Floor-to-ceiling tile costs more in material and labor — but the visual return is significant
- Focus on one accent wall (the shower wall or the wall behind the toilet) if full tiling isn’t in budget
- Peel-and-stick tiles on the upper half of a wall: $25–$60 for a realistic looking update
Grout color reminder: match grout to tile to maintain the continuous visual flow. Light grey grout on white tile. Warm beige grout on cream tile. Matching grout turns 1,000 individual tiles into one seamless surface.
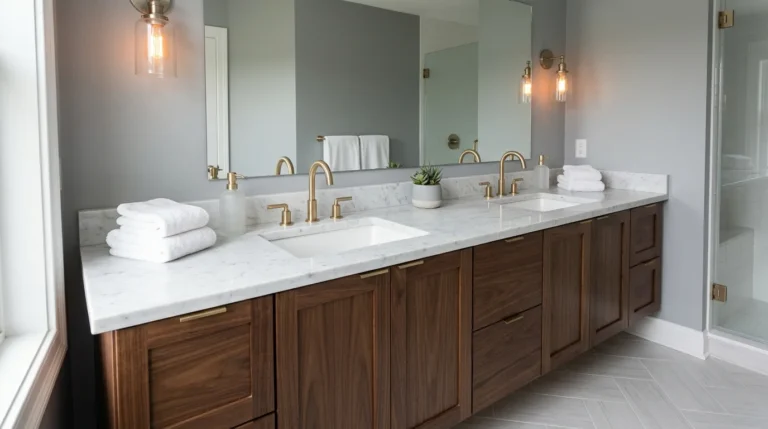
13. Add Sconce Lighting at Eye Level
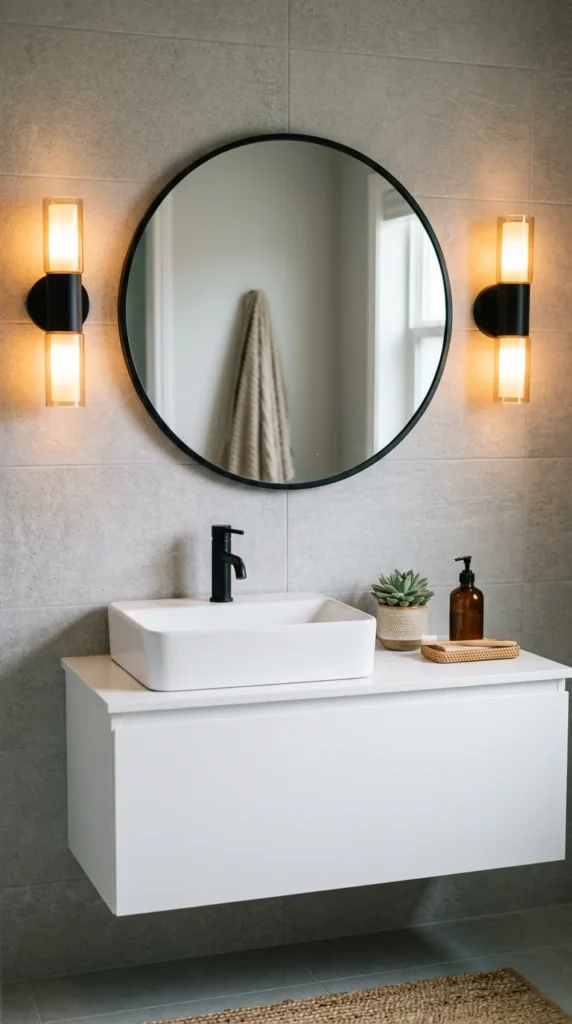
Overhead lighting in small bathrooms is almost always unflattering and inadequate. A single ceiling fixture casts shadows downward — making faces look tired and the room feel flat and dim.
Sconces mounted at eye level on either side of the mirror provide even, flattering light that brightens both your face and the entire room simultaneously.
Why side-mounted sconces work better in small bathrooms:
- Light comes from the side — eliminates under-eye shadows
- Two light sources create visual depth
- Warm bulbs (2700K) make tile, grout, and fixtures glow warmly
- They draw the eye to the mirror zone — making the vanity feel like the design focal point
Best sconces for small bathrooms:
- IKEA STORJORM mirror with built-in lighting: $80–$150
- Amazon matte black wall sconce (plug-in): $20–$40 each
- Schoolhouse or globe-style sconces on Wayfair: $40–$80 each
Installation options:
- Hardwired (requires an electrician if no existing box): $100–$200 in labor
- Plug-in sconces with cord covers (no electrician needed): fully DIY
Use 2700K bulbs, not 5000K cool white. Warm light makes bathroom tile glow, makes skin look healthy, and makes the room feel inviting rather than clinical. This is non-negotiable in a small bathroom.
14. Declutter Every Surface Aggressively
No design trick in the world works if every surface is covered in bottles, razors, candles, and random products. Clutter in a small bathroom doesn’t just look messy — it physically shrinks the space.
Visual clutter is perceived as physical clutter. An empty surface reads as space. A covered surface reads as crowded.
The rule for small bathroom counters: 3 items maximum on the vanity top at all times.
Acceptable vanity items:
- Soap dispenser (one, refillable)
- One small plant or candle for styling
- Hand towel folded neatly
Everything else goes:
- Inside the medicine cabinet
- In a drawer organizer
- In labeled baskets on a shelf
- Under the sink in categorized bins
Products to move off the counter immediately:
- Multiple shampoos and conditioners (store in the shower or under sink)
- Makeup bags (keep in a bedroom drawer)
- Electric toothbrush charging bases (keep in a drawer or cabinet)
- Hair tools (store in a drawer with a heat-resistant mat)
This costs nothing. It takes 30 minutes. And it’s the single fastest, most impactful thing you can do today to make your small bathroom feel larger, calmer, and more intentional.
15. Choose Slim-Profile Fixtures and Hardware
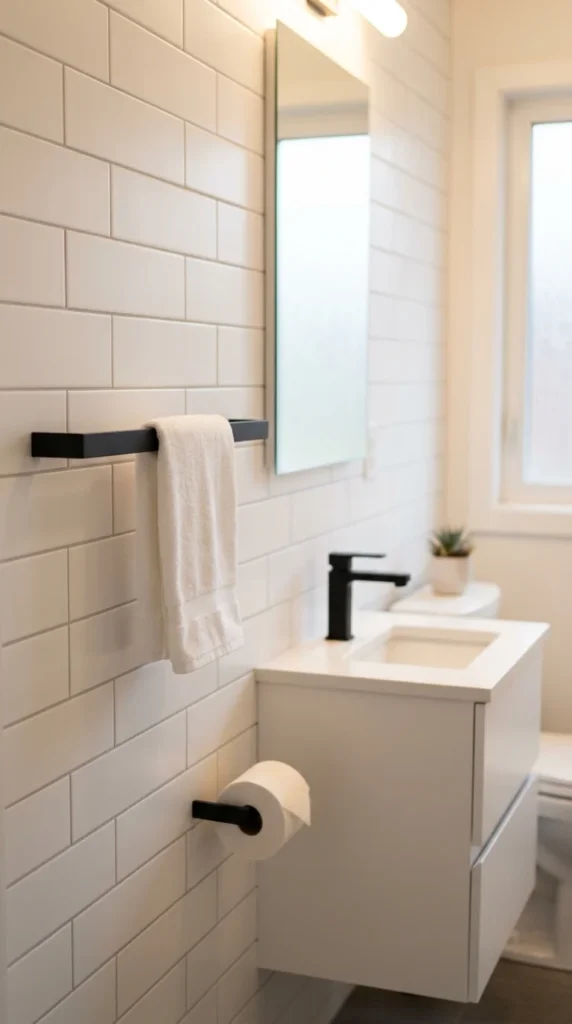
Bulky traditional fixtures — wide towel bars with heavy decorative bases, chunky toilet paper holders, ornate robe hooks — add visual weight to every inch of wall space.
Slim-profile, minimal fixtures take up less visual space and make walls feel more open, even in the same square footage.
What to swap:
- Wide ornate towel bars → slim 18mm diameter matte black or brushed nickel bars
- Decorative toilet paper holder with shelf → slim wall-mounted single post holder
- Multiple small hooks → one slim double hook or a row of minimal single hooks
- Bulky faucet with decorative base → slim single-hole faucet with a clean neck
Best sources for slim minimal hardware:
- Amazon matte black bathroom hardware sets: $30–$80 for a full set
- IKEA LILLÅNGEN accessories: $5–$15 per piece
- CB2 or Article for higher-end minimal options: $30–$80 per piece
Buying as a matching set matters: when all hardware shares the same finish and design language, the eye reads the room as cohesive — and cohesion feels calm and spacious.
A full hardware swap (towel bar, TP holder, 2 hooks) costs $40–$100 and takes under two hours. It’s one of the cleanest upgrades you can make with a screwdriver and an afternoon.
16. Use a Curtain Instead of a Solid Door
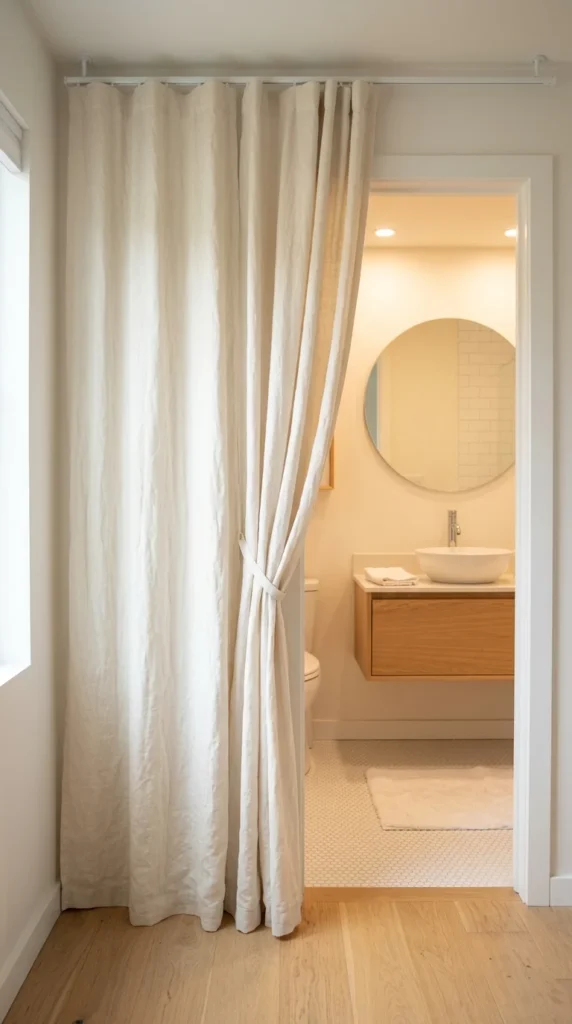
A solid bathroom door swings into the room and consumes 9–12 square feet of floor arc space — space you can never put furniture or storage in.
Replacing a solid door with a curtain, barn door, or pocket door eliminates the swing arc and immediately reclaims usable floor space.
The curtain option is the cheapest and most renter-friendly:
- Remove the door from its hinges (takes 5 minutes)
- Install a ceiling-mounted curtain rod or a tension rod in the doorframe
- Hang a wide, slightly weighted linen or cotton curtain
- Gather to one side for a casual, open feel
Best curtains for this use:
- IKEA RITVA linen curtain panel: $15–$25
- Amazon semi-sheer cream linen: $20–$40
- Cotton canvas panels (heavier, more privacy): $25–$50
For a more permanent solution:
- Barn door hardware kit: $80–$150 — slides along the wall, no swing arc
- Pocket door conversion: $200–$500 — slides into the wall, maximum space saving
Even if you only use a curtain temporarily while saving for a barn door, the floor space you reclaim in a small bathroom is immediately noticeable. This is especially effective in galley-style bathrooms where every square inch counts.
17. Add a Skinny Open Shelf Above the Toilet
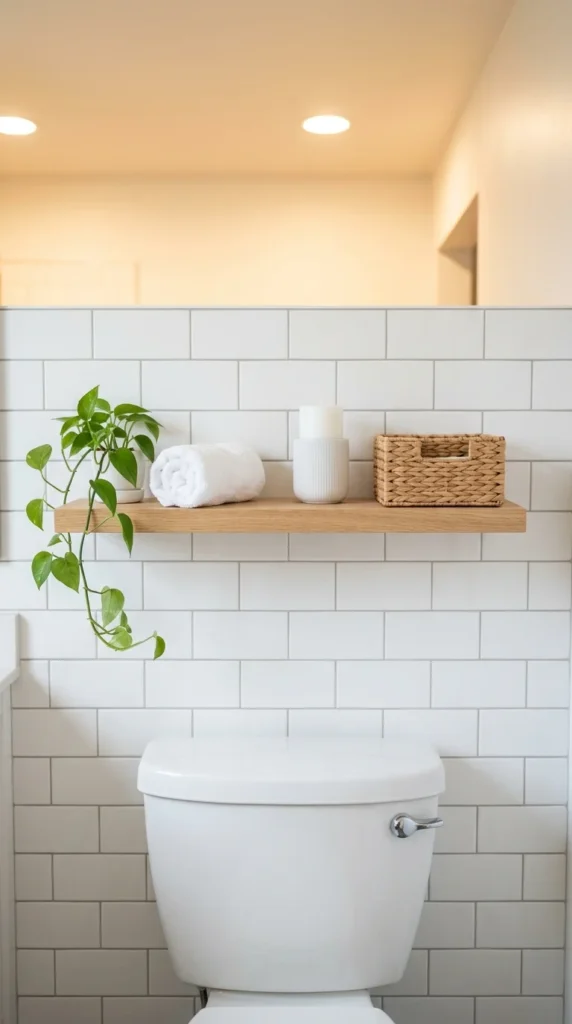
The wall above the toilet is almost always wasted space. It’s too high for most things, too narrow for a cabinet, and usually just sits empty — a missed storage and styling opportunity.
A single slim floating shelf above the toilet turns dead wall space into functional, decorative storage without adding bulk or taking up any floor space.
What to put on it:
- A small trailing plant (pothos works perfectly — tolerates humidity)
- One rolled hand towel
- A small candle or diffuser
- A tiny wicker basket holding cotton rounds or Q-tips
- A minimal piece of artwork or a small framed print
Shelf specifications:
- Depth: 8–10 inches maximum (shallow enough to be proportional above a toilet)
- Width: Match the toilet tank width (approximately 18–24 inches) for visual balance
- Height: 12–18 inches above the top of the toilet tank
Best options:
- IKEA LACK wall shelf: $8–$15
- Floating pine shelf from Home Depot (cut to size): $10–$20
- Amazon floating wall shelf with hidden brackets: $20–$40
Mount it into wall studs for secure installation. If studs aren’t available, use drywall anchors rated for 20+ lbs.
Keep the shelf minimal — 3–5 items maximum. Overcrowding a small shelf creates chaos, not style.
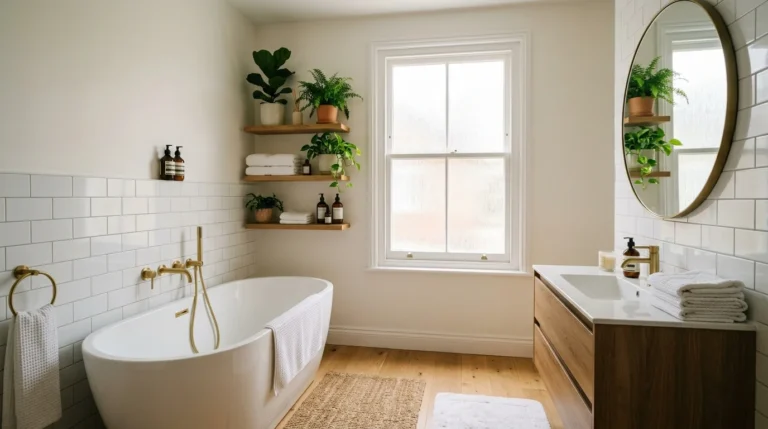
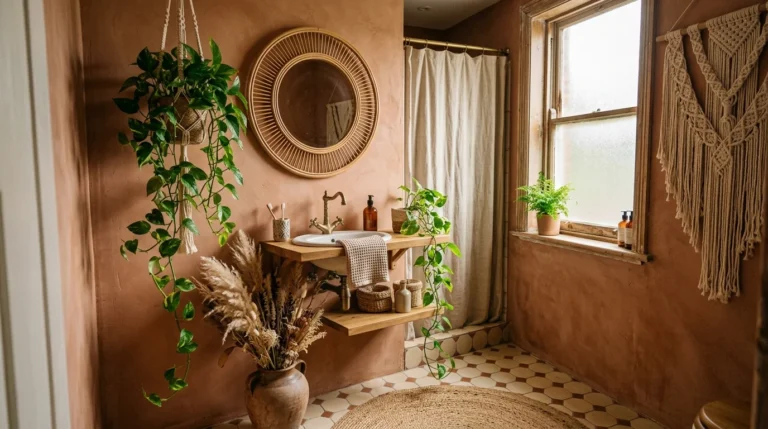
18. Bring in One Plant to Add Life and Scale
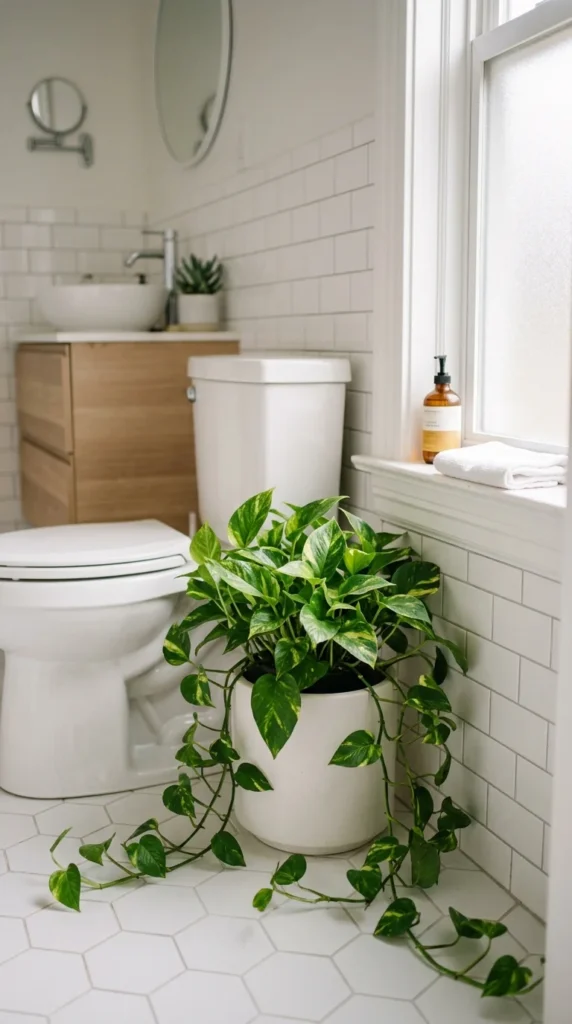
A bathroom without a plant feels sterile. Clinical. Like a doctor’s office — not a space where you want to spend any extra time.
One well-chosen plant changes the atmosphere of a small bathroom completely. It adds color, organic texture, and a sense of calm that no product or fixture can replicate.
Best plants for small bathrooms:
- Pothos (tolerates low light, loves humidity, trails beautifully)
- Peace lily (thrives in humidity, purifies air, elegant white blooms)
- Snake plant (tolerates nearly any conditions, architectural shape)
- Air plants (no soil needed, mount to wall or place on shelf)
- Aloe vera (loves bright indirect light, functional too)
Where to place them:
- A large floor plant in a corner beside the toilet or bathtub
- A small succulent on the vanity top (one only — counts as your 3-item rule)
- A trailing plant on the top rung of a ladder shelf
- A hanging plant from the ceiling hook near the window
- Air plants on a small piece of driftwood mounted to the wall
Cost:
- Pothos cutting from a friend or neighbor: free
- Small pothos or snake plant from a nursery: $5–$15
- A large statement floor plant: $20–$50
One plant is enough. Two or three start to feel like a greenhouse in a tight space. Pick one — make it beautiful — and let it do its work.
Conclusion
A small bathroom isn’t a problem to solve — it’s a design challenge to work with. The 18 tricks in this list share one common idea: perception matters more than square footage. Exposing the floor, removing visual barriers, multiplying light, and clearing surfaces all trick the eye into reading the space as larger, calmer, and more intentional. You don’t need to renovate, spend thousands, or tear out a single wall. Start with what costs nothing — clear the counter, swap the shower liner, repaint the ceiling the same color as the walls. Then layer in the bigger changes over time. Every improvement adds up, and the result is a bathroom that feels like it belongs in a design magazine — no matter how small it actually is.